|
|
|
Many photographers have used macro photography in their careers at one point, and a few have used it extensively. The one plague when shooting macro is the very shadow DoF (Depth of Field) that can cause a large portion of the subject to be out of focus. There are many techniques and methods discussed such as photo blending and photo stacking and many different methods discussed to get that perfect shot.
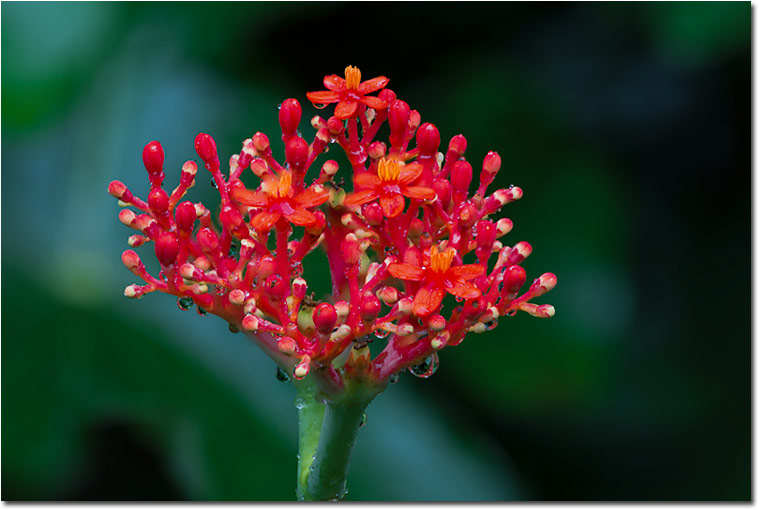
When shooting insects, photo blending and stacking techniques most of the time will not work. So you only have one chance to get a good shot and try to get much of your subject in focus as possible. Shooting flowers and plant life allow you to use these techniques and get great results, as long as the wind is not blowing. There’s one technique that I want to discuss in further detail, and that’s a photo stacking method that some photographers are not aware of. The photo image shown below is the same image shown above with this photo stacking method used. As you can see, everything is in focus from front to back.
For this discussion I will be using Photoshop CS6 and the steps taken to get the greater DoF many of us want.Here is some advice for getting setup for the shoot:
- Mount your camera on a sturdy tripod
- Use a remote shutter release or timer
- Shoot in manual mode for more control
- For even sharper images, you can use Mirror-up Mode
- Focus on your subject and find the composition you want to shoot, make sure the background is clear of debris
- Allow a little room around your subject in the frame for post editing and cropping if needed
- Shoot using an ISO of 100
- Set the aperture to the F-Stop you desire, depending if you want a blurred background or everything in focus and sharp, I would recommend using an Aperture setting of f/6.3 or less
- Now turn the focus ring on the lens counter-clockwise until everything is out of focus on your subject
- Then slowly turn the focus ring clockwise until the closet (front) part of your subject is in focus, and take the first shot
- Again slowly turn the focus ring clockwise until the next closet point of your subject is in focus, and take the second shot
- Repeat the above step until you have covered your subject from front to rear, this may be as few as 5 shots or as many as 25 shots depending on your subjects depth
Now it’s time to take all the images you shot and place them in Photoshop. Here is a step-by-step photo stacking method I use:
- In Photoshop click on the File tab, scroll down to Scripts and select "Load files into stack" as shown in Figure 1
- When the Load Layers opens, click on Browse and locate the photos you want to include. Check the box below "Attempt to Automatically Align Source Images" as shown in Figure 2 and then click ok. Photoshop does an excellent job in aligning your images, this may take a few minutes.
- Here is a screen shot of what will be displayed in Figure 3
- Highlight all photos displayed on right as shown in Figure 4
- Click on the Edit tab and scroll down to "Auto-Blend Layers" and click that as shown in Figure 5
- The Auto Blend Layers dialog box will open, select "Stack Images" and make sure the "Seamless Tones and Colors" box is checked at the bottom as shown in Figure 6
- Photoshop will then convert each image into mask layers selecting parts of the image that are in complete focus, this may take a few minutes depending on the number of images as shown in Figure 7
- After this has completed, Photoshop will display your final image with everything in sharp focus that you shot
- Then select the "Layer" tab and "Flatten Image" at the bottom
- Then I personally save this image as a TIFF image, or you can save it any format you desire
I use Bridge to reopen the image into the Camera RAW Converter and do any cropping of the edge if needed and post-editing process like setting the White and Black Points, Exposure, and adjusting Contrast, Highlights, Shadows and other settings.
The final image shows a greater DoF than you can get with a single shot even at an aperture of f/22. There are other software packages out there that can be used like Helicon Focus and Helicon Remote that perform excellently for Focus Stacking.
Richard Higgins - NPN 3977
|
 Richard Higgins has been a professional nature photographer for over 20 years. Living in Northwest Florida, he travels regularly around the country for stock and on assignment. Mr. Higgins has had his images have been featured in numerous books, magazines, newspapers and has published articles worldwide.
Richard holds an advance degree in Physics and undergraduate degree in Wildlife Biology while studying in Colorado. He has won several rewards internationally on photographs he has taken. He also offers photo workshops and tours throughout Florida under his company’s name Nature’s Vision Photography. For further information, please visit www.naturesvision-photography.com