 |
Dust Removal in Photoshop or Photoshop Elements
Text and photography copyright Paul Skoczylas. All rights reserved.
This article is intended for people who have either:
- A scanner without Digital ICE (or other method of dust removal which incorporates an infrared scan of the film); or
- Kodachrome or B&W film to scan (as ICE and similar methods donĺt work on these films); or
- A dislike (or distrust) of any automatic dust removal method.
And who also have:
- Photoshop Elements, or a full version of Photoshop prior to version 7; or
- Photoshop 7, but donĺt want to or canĺt use the Healing Tool for dust removal, for whatever reason.
Automatic dust removal methods which donĺt have the infrared scan seldom work as well as the ICE-type methods, and often cause a general loss of detail in the image, so weĺll discount the use of those from the outset.
No matter how careful we are with our slides, we will all inevitably have some dust present on our scans. Those of us who satisfy the above criteria (no ICE, and no Healing Tool) are left with options such as the Clone Tool for removing dust from our scans. Anyone who has tried to remove dust from a 2600 by 3900 pixel (or larger) scan using only the Clone Tool knows just how time consuming and frustrating this activity can be. There has to be a better way!
Indeed, there is a better way. NPNĺs Tom Webster has an article on his website called Easy dust spotting with Photoshop. This article describes the basis for the method I will present here. I have incorporated some points from Tim Greyĺs article, published here on NPN, entitled Safe Cloning, particularly the concept of cloning to a new layer to avoid changing your original pixels, as well as a few simplifications that Iĺve found through experimentation. I would encourage the reader to read both these articles, as they provide more detailed explanations to some points in this article.
Before getting started with the dust removal technique, there is one question: Should the dust removal be done before or after I make corrections (such as levels, curves, or saturation) to my image. The easy answer is that it doesnĺt matter. I always do the dust removal after my other corrections. There is, however, one caveat, and this is very important. If you plan to do dust correction (by this method) after your other changes, you must be very careful with the use of the Magic Wand Tool. You must ensure that any areas selected include any dust particles within the area. (In making this statement, I am assuming that at the time you do the dust removal, your adjustments and edits are all in layers separate from your ôBackgroundö layer.)
In describing this method, I will make one important assumption: you have one image layer (normally called ôBackgroundö), and if you have other layers, they are all above the image layer and are adjustment layers. If this assumption is not true for your image(s), you will likely have to modify this technique somewhat.
The dust removal technique:
- Select your background layer in the Layers Dialog. Right-click on it and select ôDuplicate Layerůö Donĺt bother giving it a name other than the default (normally ôBackground Copyö), since weĺre going to delete it later.
- View at Actual Pixels (100% magnification) or greater. At anything less than 100%, you may not be able to see all the dust particles.
- Find an area of your image which has significant dust particles. You donĺt necessarily want to worry about the largest particle, but find one thatĺs as big as most. With the Background Copy layer active, select the Clone Tool and Alt-Click on a significant piece of dust. This sets the source for your clone tool. Donĺt worry that the source is a piece of dust (surely the source should be something other than dust!)Śweĺll rectify that in the next step. If you are a fanatic about accuracy, use the Info dialog to see the exact coordinates you Alt-Clicked on and write them down for later use.
- In the Filter Menu, select ôNoiseö, and then ôDust and Scratchesůö With the preview check box in the dialog turned on (so you can see the effect of changing the settings), adjust the Radius and Threshold as follows. The Radius should be just large enough so that the dust spots disappear (and no larger). The Threshold should be set so that any grain or noise in the image looks the same as it did before. (Turn the preview check box on and off to compare before and after views). Donĺt worry about the fact that you lose detail in the image with this filter. (This is why we apply it on a copy of the Background layer.)
- Add a new layer to your image (Layer menu, ôNewö, ôLayerůö). This layer should be located immediately above the Background Copy layer (and this is where it will be placed, since the Background Copy layer was active at the time). Call this layer ôDustö or whatever name you want. (Doing all the cloning onto this layer means you donĺt change your original pixels, and you can correct any mistakes simply with the Eraser Tool on this Dust layer.)
- Turn off the visibility of the Background Copy layer by clicking on the little eye symbol beside it in the Layers dialog. The dust spots will once again become visible.
- Make the Dust layer the active layer. (It already should be, but double-check that!)
- Your Clone Tool should still be active. I use 85% hardness (as suggested by Tim Grey), Normal mode, and 100% opacity in my Clone Tool for dust spotting. The ôAlignedö check box should be on, but the ôUse All Layersö check box should be off. The brush size is set to be about the same size as the dust spots Iĺm removing. (You can get away with making it bigger when working in out-of-focus backgrounds, or smooth areas such as skies, but keep it as small as possible when working in detailed regions.) Now simply click on the same dust spot that you Alt-Clicked on in Step 3. (Again, if youĺre a fanatic about accuracy, make sure you click at the exact coordinates that you wrote down in Step 3, but if youĺre on the same dust spot, you should be close enough.) The dust spot will magically disappear!
- Now simply click on each dust spot in your image. (Remember to work at 100% or greater magnification to ensure you can see them all. As you click on each spot, it should disappear. Be sure to scroll throughout the entire image to find all the spots.
- When youĺre all done, delete the Background Copy layer.
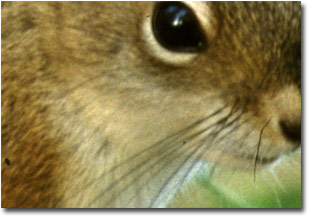
Before |

After |
And thatĺs it. Youĺll find that the first few times you do this, youĺll need to refer to this list at each step, but soon it becomes intuitive and you can memorize the technique quickly. (And probably come up with your own improvements.)
Some notes:
- You should only Alt-Click with the Clone Tool once, in Step 3. Your first click with the Clone Tool in Step 8 must be at the same spot as your Alt-Click from Step 3Śa couple of pixels off wonĺt matter, but it should be close. This aligns the source and target for the Clone Tool, and you shouldnĺt need to worry about realigning them.
- Tom Webster suggests setting the Clone Toolĺs brush mode to ôLightenö for working with slides or ôDarkenö for negatives at Step 8. I did this at first, but then I kept forgetting to do it, and found I didnĺt notice a difference.
- If you have a larger particle of dust which didnĺt get removed by the filter in Step 4, donĺt worry about it until after youĺve finished with all the smaller dust particles. Then deal with it with regular cloning techniques, as discussed in Tim Greyĺs article.
- Iĺve found that scratches and dust may require different settings in the filter in Step 4. If you have a scratch on your film, it may be advantageous to go through this procedure twice: once for the dust, and again for the scratch, with different filter settings.
- You can leave any adjustment layers visible during the dust removal operation.
- If, when you click on a dust spot, it disappears, but is replaced by a spot that is a different colour or shade than it should be, you probably made a mistake somewhere. The most likely causes are:
- The Clone Tool is set to ôUse All Layersö.
- The dust spot is in the middle of a region that was selected using the Magic Wand Tool, but the dust itself was not selected. A Levels or Curves (or Saturation, etc.) adjustment was then applied to the region, but not to the dust spot.
- The assumption I stated (that you have one image layer, with adjustment layers above it, and nothing else) is not valid for your image.
Following this technique will allow you to remove any dust, hairs, or scratches from your scanned images without suffering any loss of detail in the rest of the image. With practice, you should quickly get to the point where you can clean up most images in five minutes or less.
Paul Skoczylas - NPN 726
Comments on NPN digital photography articles? Send them to the editor.


|

