My Place in the World - the NPN Roving Camera Project
Camera Instructions

The Rolleiflex MiniDigi is a small, easy-to-use point-and-shoot camera. There are no adjustments for aperture, shutter speed or focus. Included with the camera is a 256MB SD card, a USB SD card reader, spare batteries and a lens cleaning cloth, all packed in a small Lowepro carrying case.
Please review the information on this page before using the camera.
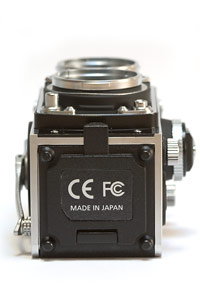
The battery chamber (CR2 lithium battery) and Secure Digital (SD) memory card slot are accessed from the bottom of the camera. To open the cover, push the tab on the front of the cover straight back. Camera shown above with cover in place.
|
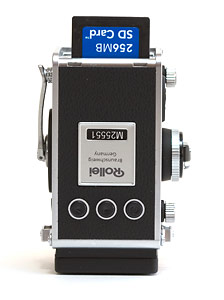
The SD card is inserted into the slot as shown, with the blue card label facing the back of the camera. Push the card until it clicks into place. To remove the card, push down on the card to release it and then pull straight out.
|
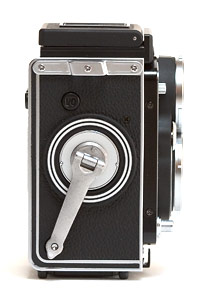
To turn the camera on, depress the button on the right side of the camera. The camera will automatically power off after 60 seconds of inactivity. The crank handle must be turned one full revolution to set the shutter for each picture.
|
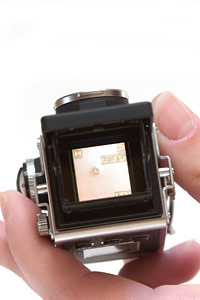
With the hood opened on top of the camera, the viewing LCD can be seen. To close the hood, pinch the sides of the hood inward to collapse the hood and close the cover.
|
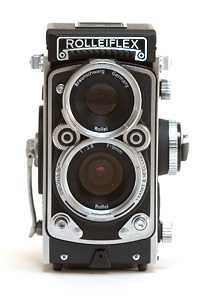
The shutter release button is on the front of the camera, bottom right side as you face the back of the camera. Remember, the crank handle must be turned for each photo. To review the photos on the SD card, press the mode button on the bottom left to toggle between Record and Playback modes. The top lens is a fake viewing lens – the bottom lens is the actual Record lens of the camera.
|
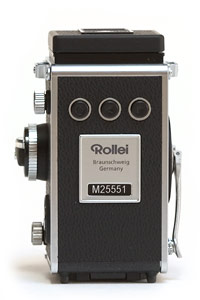
The back of the camera has a row of three buttons that are used for viewing the photos on the SD card and for setting resolution. Facing the back of the camera from left to right; Image delete button, Previous image, Next image. When in Record mode, the Previous and Record buttons are also used for setting resolution. In the viewfinder, H equals 1760 X 1760, N equals 1200 X 1200 and L equals 640 X 640. Please keep the camera set at the highest (H) resolution!
|
Taking Photos
- Please use the camera strap!
- Open the hood on the top of the camera
- Turn on the camera using the button on the right side
- Turn the crank handle one revolution to set the shutter. If the shutter is already set, the handle will not turn. Do not force the handle!
- Compose the photo by looking down through the hood on the top of the camera. I have found holding the camera as close as possible to the eye works the best.
- Depress shutter button. Hold the camera as steady as possible until the BUSY signal appears in the viewfinder. Be sure to keep your fingers clear of the Record (bottom) lens on the front of the camera.
Downloading Files
A USB card reader is included with the camera. Most computers should recognize the reader as soon as it is plugged in. Open you image editing program to access the JPEG files and post-process as needed for posting in the NPN Roving Camera Gallery. Be sure to save the original files to your computer – these will be needed to create the book!
Since the 256MB card will hold over 600 images at the high resolution setting, there is no need to delete your images from the card unless you want to do so. Please be sure to save your photos to your computer!
If you have any questions about using the camera, please contact us at editor@naturephotographers.net. If you have any questions about the NPN Rovng Camera Project, please contact mark Hobson at blovius@charter.net.


|

