Spring is hitting my home range right now, an I'll be spending more time in the field and leading a lot of photo tours and workshops in the next while. So...over this past weekend I decided to test some new gear and capture some teaching images. So I plunked myself down along one of the local "squirrel highways" and nabbed some shots...
One of the very first thing novices learn when they acquire their first SLR is that the "depth of field" (or DOF) of an image varies with the aperture used to capture that image. Yet, on the instructional photo tours I lead I get two questions very, very frequently - and often from highly experienced photographers. The questions?
1. How DO you determine DOF when capturing wildlife images in a field setting?
2. Even if I know HOW to control my DOF in the field, what is the "right" amount of DOF for a given situation?
It's impractical to deal with both of these questions here, so I'll just ramble on a bit about question 2 here - the aesthetic aspects of DOF. But first, a tiny bit of context...
Unlike studio photographers, nature photographers - and particularly wildlife shooters - have very little control over the conditions under which they capture their images. The vast majority of the time we can't (and don't want to!) control what our subject is doing or control other critical variables, like lighting. BUT, one thing we have
some control over during image capture is the aperture we choose and, consequently, our DOF. Of course, available light and exposure issues limit our control, but thanks to the new generation of DSLR's that perform so well at moderate to high ISO's, we now have
more control over our aperture and DOF than ever before. Ensuring you know how to "harness" that DOF is absolutely critical to capturing visually interesting images...
Now back to that pesky question #2...
The question of "what is the right amount of DOF" touches on the aesthetics of an image and is much more subjective and thus totally open to debate. But here's my take on the creative aspects of using DOF effectively. I'm a huge believer that the philosophy of
"simplify and isolate" (simplify your composition, isolate your subject) is a great "mindset" for a wildlife photographer to take into the field. One way of "simplifying and isolating" is to use a narrow DOF to remove distractions from the background of an image.
I'm also a real believer in the concept of
"visual contrast", i.e., that the eye is drawn by contrast in any of a number of visual differences in a scene - differences in light (traditional contrast), differences in colour, differences in apparent motion (think "panning" with a sharp subject with blurred background), and differences in image sharpness. When you apply this "visual contrast" model to DOF, it basically says the eye will be drawn more to sharp regions in an image if there is a sharpness differential in a scene, i.e., that parts of the image are out-of-focus. And, by the way, I also believe that having distinct soft out-of-focus zones in an image can contribute to the apparent sharpness of the portions of the image that ARE in focus.
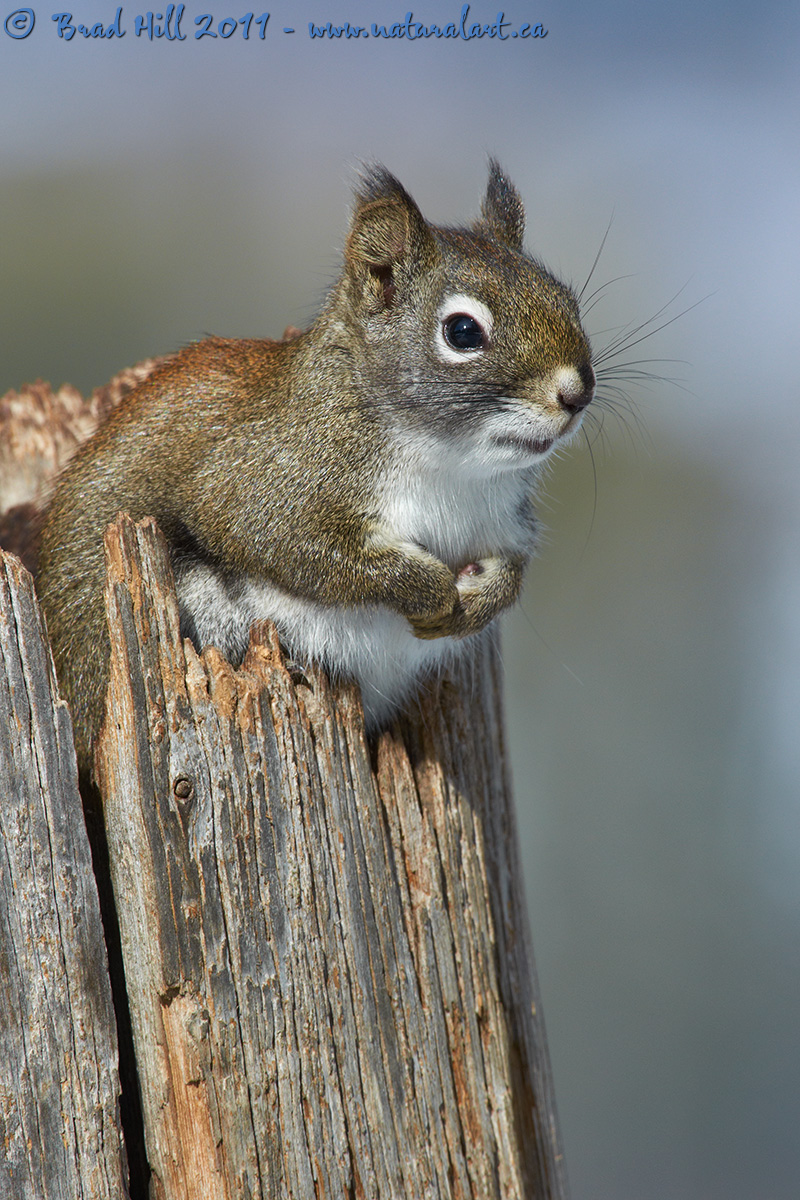
In the case of this image I wanted the eye drawn to the eye and nose region of the squirrel, so I was more than willing (and even happy) to have the distal portions of the back slightly out-of-focus to add to this "effect" (of drawing the eye). And, of course, I wanted the background totally soft and distraction free...
The moral of the story? Simply this: knowing how to control and effectively use your DOF in a field setting is a huge asset for a wildlife photographer to have. Knowing (and judging) your DOF is a technical task, but choosing the one that will best help you to achieve your aesthetic goal is a creative endeavor. Just another instance of the right-brain, left-brain "cooperation" that's needed in wildlife photography.
Subject: Red Squirrel (
Tamiasciurus hudsonicus) mugging for the camera
Location:Findlay Creek, BC, Canada
Camera: Nikon D7000
Lens: Nikkor 400 mm f/2.8 VRII lens paired with TC-20EIII 2x teleconverter (effective focal length of 1200mm).
Exposure: 1/160s at f16. ISO 180. -0.67 stop compensation from matrix metered exposure.
Crop: None - this is full frame.
If you're interested in my thoughts on question #1 above, I have an even longer (

) discussion about this topic on my website where I address some ways to assess your DOF in the field. Just click on the "In the Field" tab for the discussion...
http://www.naturalart.ca/galleries/latest/.
If there are any Nikon users who are curious about that 2x TC - there's links to 100% res images on my website (just use that same link above)
Comments and feedback greatly appreciated...probably better to view larger version prior to doing so...
Cheers...
Brad

Comments
16 commentsMax
Good questions. In this case I was using a lens/TC (and camera) combo that I wasn't too familiar with, so I consulted some DOF tables on my iPhone when I was waiting for a squirrel to show up. They told me I had about 2" of DOF to work with @ f16, and I knew it would be distributed equally in front of and behind the focal point (when you shoot with longer than a 200mm lens you're pretty much at a 50:50 front/back DOF distribution). Anyway, I definitely wanted that stump in focus and the nose/eye region in focus, so and I until the squirrel was positioned so that the nose was on close to the same vertical plane as the stump and focused just behind the nose.
RE: the soft background at f16. No digital softening of that - all optics. The whole key on get smooth, soft backgrounds is ensuring the right ratio of relative distances, i.e, you have to ensure that the background is significantly further from the subject than YOU are from the subject. With shorter focal lengths you need a higher ratio (subject to background:subject to you), but with this 1200mm equivalence in lens the background didn't have to be too far away at all to render smoothly (the light green is trees about 20 meters behind the subject; the subject was about 9 meters from me). I could have stopped down to f32 and still had a soft background (but then would have been introducing some pretty major refraction issues).
Hope that helps...
Brad
Max
Many think that the 33:67 distribution in front/back of the focal point is for all lenses - you'll even find books on wildlife and bird photography - where telephotos are the rule - discussing it as though it was a law written in stone (including in "The Art of Bird Photography" by Art Morris). I guess they never bothered to check DOF tables for lenses of 200mm or longer!
You said:
I agree that DOF preview is important in landscape work, but I personally almost always find that button next to useless when I'm doing wildlife work with dynamic subjects (where the goal, more often than not, is optimizing DOF rather than maximizing it). And, you couldn't get me to give up my autofocus even under the threat of death!
Interesting how different photographic disciplines use the same tools so differently!
Cheers...
Brad
Technical aspects aside, your image of this squirrel in such a delightful little pose has me smiling ear to ear :^) And to think you captured such a fantastic shot while you were simply testing out some new gear, making it sound like it was such a piece of cake for you, well, while I'm green with envy at the level of your skill, I'm also thoroughly inspired by the thought that one day I may also arrive at the same level too ;^)
Kind regards,
Ashley
Think the image is superb lovely detail and he or she posed beautifully for yoiu.
Keith.
You asked:
DOF calculators are available for iPhones and iPads, plus you can find them online. Here's one example:
http://www.dofmaster.com/dofjs.html
Most DOF calculators give you total DOF, distance in front of - and behind - the subject that's in focus, and some even give percentages of how the DOF is distributed (% in front of focal plane to % behind focal plane).
To calculate the depth of field you must specify the camera (what's really needed is something called the "Circle of Confusion" - really! - and this is directly related to the size of your camera's image sensor), focal length of the lens, aperture, and, of course, the distance to your subject (focal distance).
Hope this helps!
Cheers...
Brad
BTW, I have to agree about getting rid of auto-focus...think I can give up DOF preview before that any day!