1 - Introduction
Photoshop is now over 20 years old. This makes it a mature and feature-rich software package. CS6 is an important update that features many changes. In my opinion these changes are more about interface and menu improvements than about introducing dramatically new features. This makes upgrading to CS6 an option rather than a necessity. However, if you do not have Lightroom 4, the new Camera Raw alone is worth the update price. On the other hand, if you have Lightroom 4 and want to control your expenses, then upgrading to Photoshop CS6 is not indispensable.
One way to look at Photoshop CS6 is as a refinement rather than a revolution. Previous releases introduced revolutionary tools such as shadow highlights or content aware to name only two. We donĺt have any of that in CS6. Instead, what we have are many refinements, fine tunings of previously available tools and functions if you will. Depending on your needs this collection of improvements may or may not justify upgrading to this new version.
In this essay I will be presenting the new features of CS6 that I find the most useful and interesting for the type of work I do. In doing so I will pass on other new features, not because they are not important but because I do not use them in my work.
2 - A New Startup Screen
Each version of Photoshop features a different startup screen. CS6 departs from the previous Photoshop startup screens with a slightly more fancy design:
The CS6 Startup Screen
3 - A New Interface
The default interface is now dark grey. You can change it from dark grey to middle grey or light grey by going to Preferences > Interface:
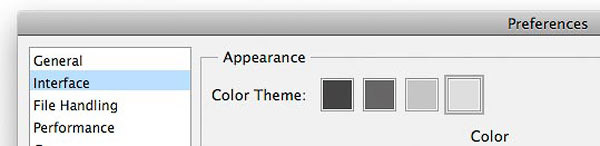
CS6 Interface color options
My preference is for a light color interface so I changed that immediately. As in CS5, you can customize the interface so that it looks exactly the way you want it, then save it under the name of your choice and recall it whenever you wish. CS6 comes with a number of preset interfaces optimized for specific tasks such as design, etc. I saved mine under the name ôAlainö you can see it here together with the preset CS6 Interfaces:
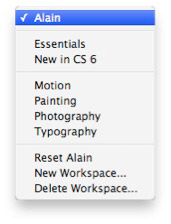
The Interface drop down menu at the top right of the screen
The menus have been reworked. For example the filter menu has now fewer categories and filters are grouped in a more logical fashion. The Workplace menu, at the top right of the screen, is now a drop down menu instead of a row of names. This, and other changes, make the interface look cleaner and less cluttered.
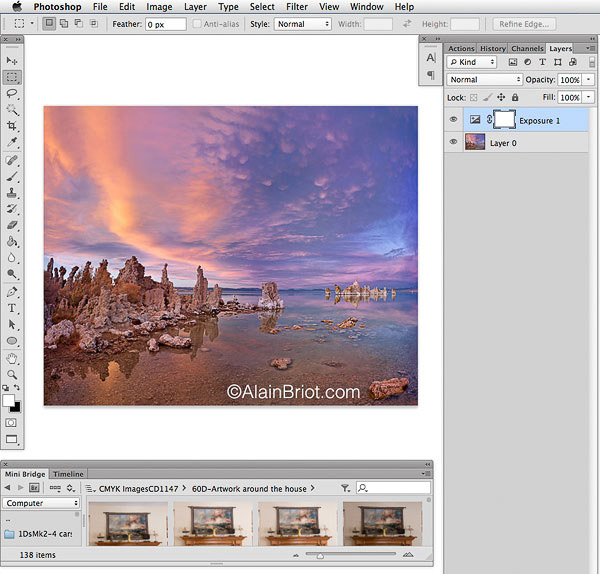
The Adjustment and properties dialog boxes, available from the Window menu, are now presented in two separate windows making it easier to select a specific adjustment layer and set the exact properties for that layer. However, the layer mask options dialog box now opens from the properties dialog box by clicking the mask icon at top left. It no longer has its own window as it did in CS5:
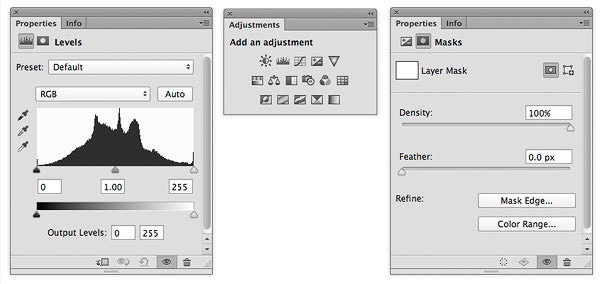
The new Properties, Adjustment and Layer Mask Options windows
Finally, the tool icons are also slightly different from CS5. These are only cosmetic changes:

The CS5 (left) and the CS6 (right) tool menus
4 - New Adobe Camera Raw (ACR)
ACR features a new processing algorithm, new sliders and new features. Except for minor differences regarding how the different functions are presented, ACR and Lightroom use the same processing engine and the same processing controls and sliders.
5 - New Bridge
Bridge is now available under the File Menu. You can also open a smaller version of Bridge called Mini Bridge under the File menu or by going to the Window menu and doing Window>Extensions>Mini Bridge. Mini Bridge opens as a window at the bottom of the Photoshop window. This windows works as a film strip, very much like Lightroom, making it useful when you need to browse through raw files quickly then work on them in Photoshop. Clicking on a raw file in Bridge or Mini Bridge opens it in Camera Raw where you can set the conversion settings then open it in Photoshop.
Mini Bridge in CS6
6 - The Patch Tool is Now Content Aware
Here is how it works:
- Select the patch tool
- Select content aware at the top of the screen
- Draw around the area you want to replace
- Click in that area and drag it until you the selected area shows the new area you want to replace it with
- The content aware algorithm will automatically blend the selected area, feather the edge and make it look seamless
Content aware is also used with the new content-aware move tool. Use it to move objects and extend elements. Just draw around the object to select it then move it and click OK. Content aware automatically blends and feathers the selection so it merges with the background. It is not perfect but it is a start.
Keep in mind that these two tools do not always give perfect results. However, their level of accuracy is good enough to get you started. It does save some time even though we have to complete the work by hand.
7 - Adobe Kuler is Now Part of CS6
I like to use Adobe Kuler to find color harmonies and to help me with other aspects of color work (see my essay on Color Harmonies on this site for more information about my use of color). So far I had to access Kuler outside of Photoshop. In CS6 I can use Kuler's features from within Photoshop by going to Window > Extensions > Kuler:
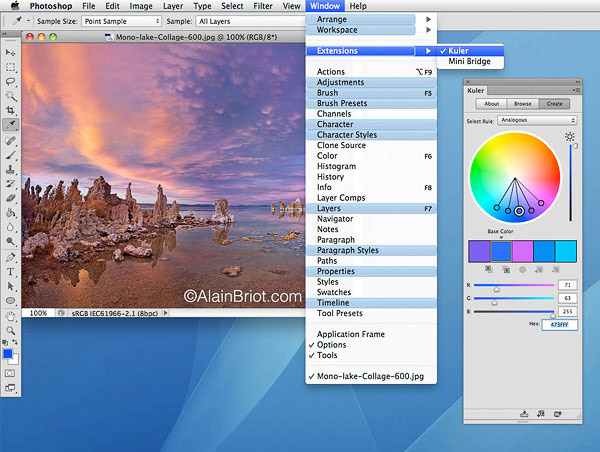
The Adobe Kuler dialog box is accessible from the Windows menu then by choosing Extensions>Kuler
8 - A New Crop Tool
The crop tool has been improved and is now non-destructive. This means you can undo or modify the crop at any time after you click OK. Cropping is no longer a final and permanent operation. If you want to make the crop permanent and non-reversible, all you need to do is click the checkbox next to ôDelete Cropped Pixelsö at the top of the screen and the crop will be permanent. As long as that box is unchecked, then all cropping is reversible. Photoshop remembers the original image and you can return to it at any time by selecting the crop tool and stretching the crop boundaries back to the size of the original image.
The crop tool also has overlays for several composition rules, including golden ratio, golden spiral, rule of thirds, etc. Plus, you can add your own crop formats if you want. These are similar to the crop options in Lightroom.
You can also straighten the image while you crop. No more cropping then straightening in 2 separate operations. Both can be done at the same time. Finally, by clicking on the Straighten option at the top of the screen, then drawing a straight line along the edge you want to make horizontal, you can have Photoshop automatically level the image. Very practical.
9 - Several Adjustment Layers Now Have an Auto Adjustment Button
I donĺt use this feature myself for serious work, but at times I like to see what the software suggests, either as a point of departure or just out of curiosity. In any case it canĺt hurt to have this feature. The Auto adjustment button is available in the Curves, Levels and Brightness/Contrast adjustment dialog boxes:
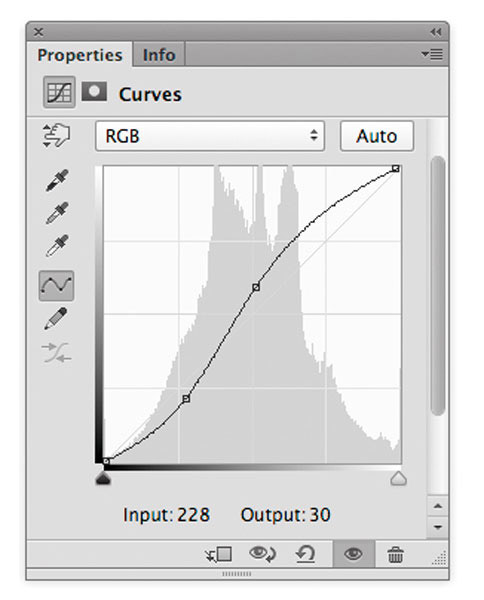
The curves dialog box with the auto feature button at top right
10 - Background Save
Photoshop now offers the option of saving your work in the background, while you work, without you having to do anything. It also offers the option of saving recovery information automatically at set intervals. Both options are available from the Preferences menu, under the File Handling pane:
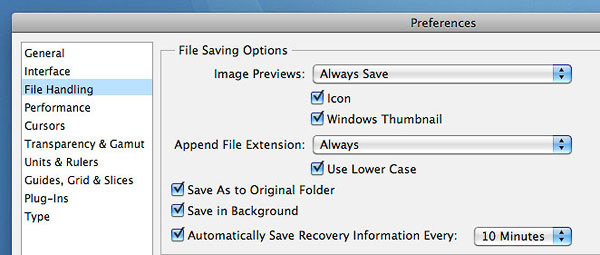
You can turn both options on and off and set the recovery interval as you like
11 - Tool Presets
Presets can now be created and saved for any tool using the Tool Preset dialog box available under the Window menu. Once you have created some presets you can export them with the preset manager so that they can be used on a different computer or shared with another Photoshop user.
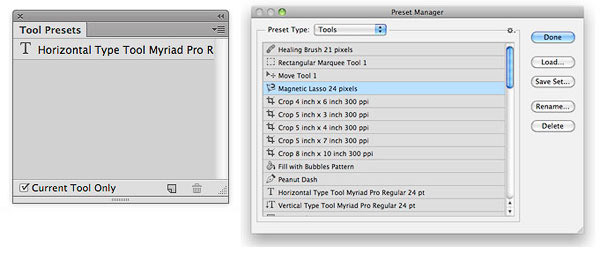
The Tool Presets and Preset Manager dialog boxes
12 - New Blur Gallery
Photoshop now has a Blur Gallery. You access this feature by going to the Filter menu, selecting blur, and then selecting one of the top 3 options: Field blur, Iris blur or Tilt shift. When you do you get the dialog box below.
Of the 3 blur options in the gallery my favorite is the iris blur. The two others are interesting but do not offer as many options or possibilities. The Iris blur lets you control the diameter of the blurred area together with the amount of blur applied to the photograph, making it easy to control the final effect.
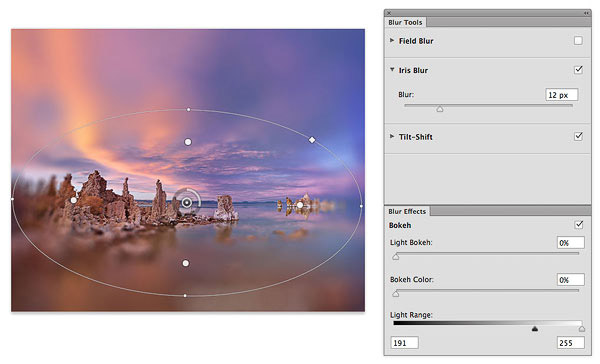
Blur Gallery dialog box and iris blur effect
13 - Better Shadows / Highlights Processing
The shadow highlight controls remain the same, but the processing has been greatly improved. There is now far less halo when applying shadow and highlight recovery, and that is a noticeable improvement.
14 - New Text Tools
The new text tools are found in the Window menu in the dialog boxes titled Paragraph and Character. These are very useful for defining new type settings. A character style dialog box is also available to save your settings and to share them with others.
This gives Photoshop typesetting capabilities that are very similar to those offered by InDesign. There is even a Lorem Ipsum text generator, a very practical feature when you want to fill an area with text quickly. To use this feature simply select the Text tool, go to the the Type menu then select the last item on the drop down list: Paste Lorem Ipsum
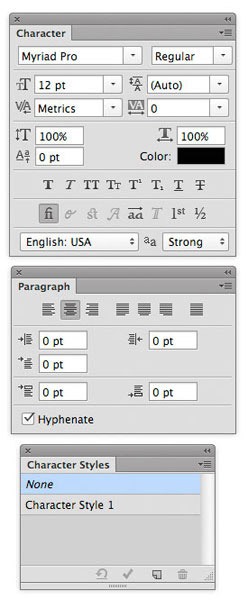
The Character, Paragraph and Character Styles dialog boxes
15 - Layer Organization
Layer organization has become both easier and more complex in CS6. We now have 6 organization categories, each with multiple options. All 6 categories, together with all their options, are visible in the screenshots below.
Once layers are placed in categories they can be filtered so as to show only layers in that category. This makes things simpler when you have a huge list of layers each with different functions.
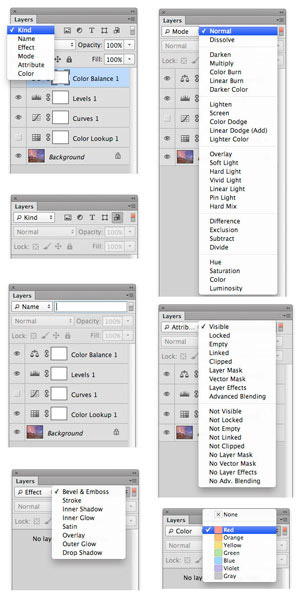
The 6 layer organization categories
16 - Faster Processing
Photoshop now uses the Adobe Mercury Graphics which provides faster and even real time processing for most images except huge files.
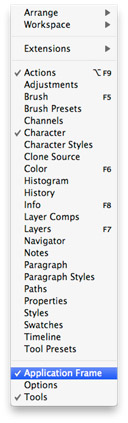
17 - Solution to the ĹSmall Image Windowĺ Problem
Sometimes when you open a photograph, the image window looks very small and tiny. If this happens, fixing it is easy: just go to window>application frame and uncheck application frame.
18 - Color Lookup
The Color Lookup function is found under: Image > Adjustments > Color lookup
- It is a sort of color grading built into CS6
- It is available from the Image menu
- It is also available as an adjustment layer from the adjustment layers palette.
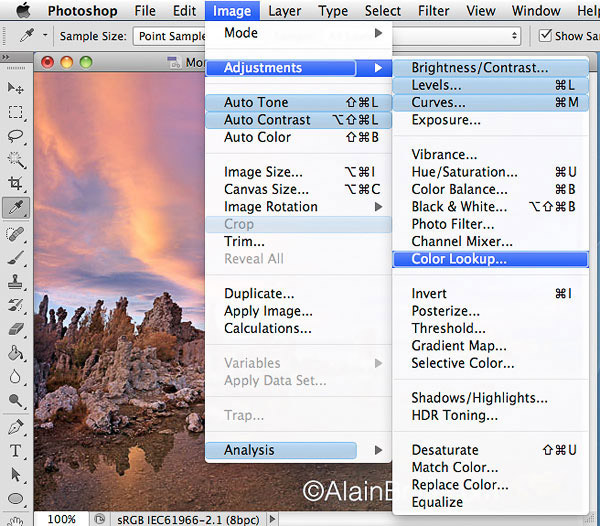
Color lookup menu command
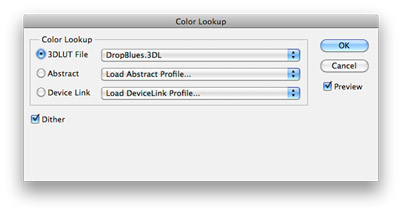
Color lookup dialog box from the menu command
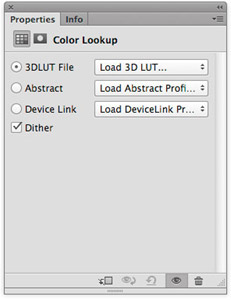
Color Lookup adjustment layer dialog box
19 - Twain Scanning in CS6
Scanning in Photoshop CS6 using Twain does not work right off the box. This is because most currently available Twain scanner drivers are in 32 bits and CS6 now works exclusively in 64 bits. While CS5 and prior versions worked in 32 bits or in 32 and 64 bits, CS6 only works in 64 bits. Since very few 64 bit scanner drivers are available, you have to follow specific steps to use your Twain scanner in CS6. This links which points to Adobe.com, explains what to do: http://helpx.adobe.com/photoshop/kb/twain-plug-photoshop-cs4-cs5.html;
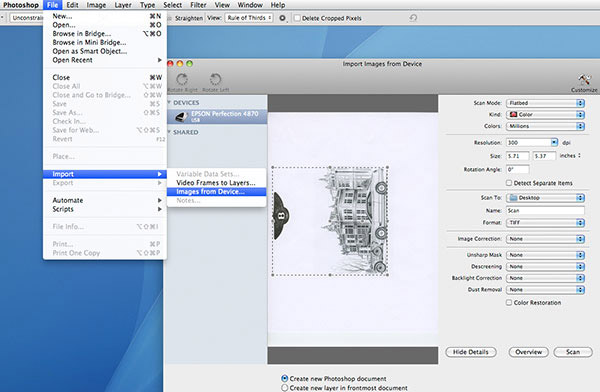
Once a 64 bit scanner driver is installed, doing File > Import > Images from device brings this dialog box in CS6
Alain Briot - NPN 2054
|
 Alain Briot creates fine art photographs, teaches workshops and offers DVD tutorials on composition, conversion, optimization, printing and marketing photographs. Alain is also the author of Mastering Landscape Photography. Mastering Photographic Composition, Creativity and Personal Style and Marketing Fine Art Photography. All 3 books are available from Amazon and other bookstores as well from Alainĺs website.
You can find more information about Alain's work, writings and tutorials as well as subscribe to Alainĺs Free Monthly Newsletter on his website at http://www.beautiful-landscape.com To subscribe simply go to http://www.beautiful-landscape.com and click on the Subscribe link at the top of the page. You will have access to over 40 free essays by Alain, in PDF format, immediately after subscribing.
Alain welcomes your comments on this essay as well as on his other essays. You can reach Alain directly by emailing him at alain@beautiful-landscape.com.