|
|
|
Silhouettes
Silhouettes are easy to take. All you need to do is find a bright background - sunsets work the best. Then expose for that background, which lets the subject you want to silhouette go dark or black.
The background should always be at the correct exposure for that area. Later work, in a program like Photoshop, can let you increase the saturation & contrast, which will also increase the silhouette effect. The main things to consider for a silhouetted subject is, first that it is readily recognizable to anyone. Second, that it stands out well in a bright area of the background. A dull subject against a dull background will only get you a dull image. Most silhouettes have to be dramatic and powerful to work best.
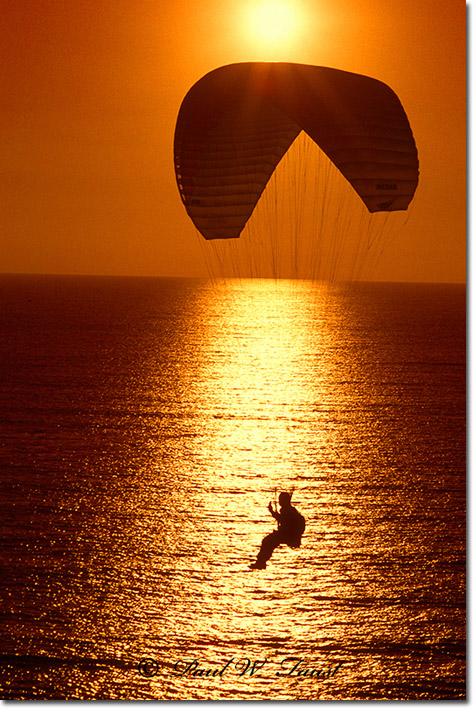 Sunsets make the best silhouette background “if” you can get them at the right time. Add water for a reflection and second area of even more light and you have a winning image. |
Nature or Man-made
All subject have more to them than just what you see up front. If you are shooting a building for an architectural image, that building has parts in the form of windows, doors, and walls. Nature is the same way. A forest has parts just like a building. It has branches, limbs, roots, leaves and ground, all of which are images in themselves. The #1 rule for finding new images in an old subject is to “look down.” You are walking right over new images. Put on your macro lens and get down on your knees & look for what might make a good image, then move around it to see what is the best angle. Too many people see something and shoot it from that first viewpoint. Most of the time you will find that the first viewpoint and first shot is not the best one you take of it. So look close, shoot often and from different angles.
Outdoor Still Life
It does not take a studio set-up to shoot good still lifes. With just a few extra tools you can get just as great a still life image outdoors as in a studio. My main still life subject is flowers. To shoot them I first consider two things, both of which is the lighting. Is it bright sunlight, or is it cloudy and overcast? A third consideration is about any wind. Windy days mean you either have to shoot at a faster speed, or somehow block the wind from moving the flowers, which is not easy to do. A cloudy day is great because that gives better color saturation and lets the background go darker and therefore is less a part of the image. But a cloudy day will mean you probably need some added fill light to make the main flowers stand out, and even your camera’s built-in flash can work for that. Small reflectors are also great for fill, easier to use, and can be folded up for easy storage. (A small reflector can be nothing more than a white paper plate - buy a pack at the store, keep them in your car and you will never be without a reflector) Bright direct sunny days need different tools to get shots that do not end up with total white-out areas because of over exposure. Sometimes in my back yard I will stretch a piece of white sheet between two poles to block and filter the sun, and then use a larger reflector to bounce light back onto the flowers where I want it. Or again I use a flash, setting it for a fill effect so I don’t get the full power which will be too harsh. Along with all of that, the one main thing I always use with my flower images is a water bottle squirt sprayer. I have yet to ever see a flower photo that looked as good dry as they do with some rain-effect water sprayed on them. Not natural? Who cares? It’s the end result that matters and if I didn’t just tell you that you would not have known the difference. - - The last and most important tool to use for outdoor still life shooting is a helper to handle the other tools. Got a friend who wants to learn photography? Make them an assistant & put them too work!
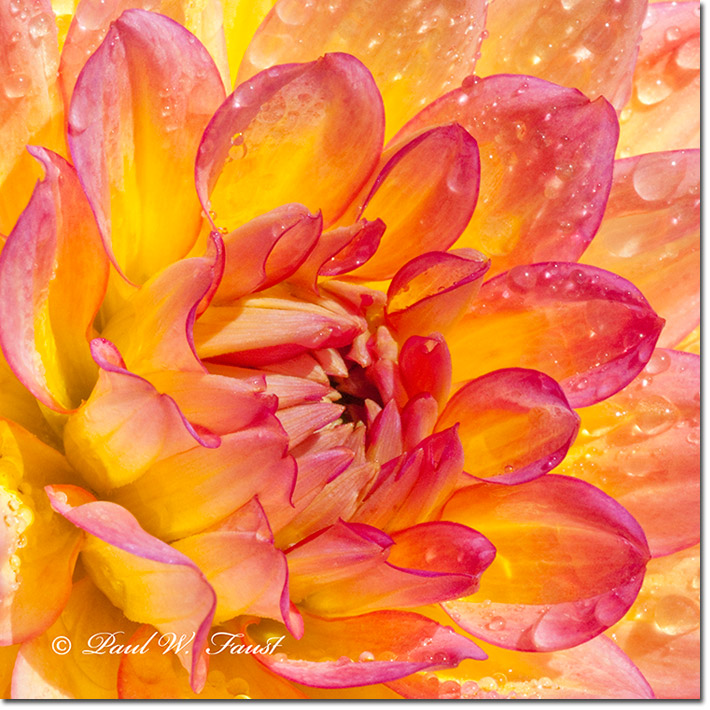 The first shot I took of this flower was nice, but not a prize winner. Add some spray mist and judge for yourself how it looks. |
Foregrounds
When you find a scene that also has a good foreground subject in it, such as a group of rocks, move in close and low with a wide angle lens. Use a small aperture setting for maximum depth of field to get sharpness from front to back. Look for any lines (like fences) in the scene to help you lead the viewer’s eye through the frame. Just remember that with any wide angle landscape shot, if there is a subject in the foreground, that subject has to be interesting for the whole image to work.
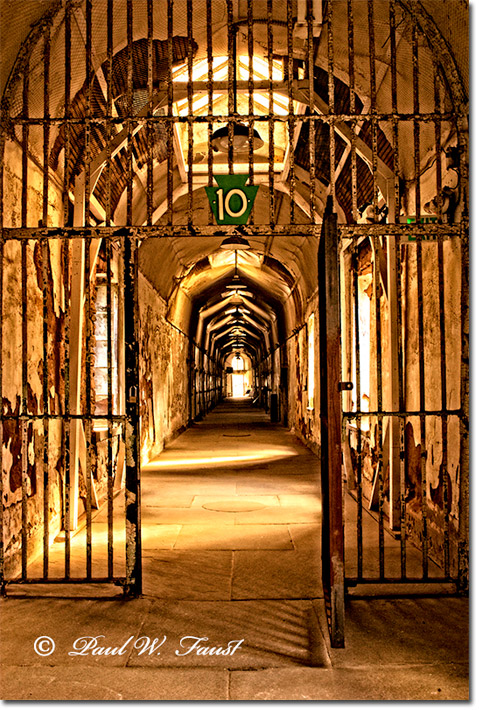 This image, shot at an abandoned state prison, is sharp from the bars in the front all the way to the far end of the cell block making the hallway feel endless. |
See next month for part two of my photo tips pieces.
Paul Faust - NPN 1680
|
 Paul W. Faust is a self-taught Fine Art Photographer, Writer, Digital Imaging, and Photo Stock Service professional. You can visit Paul’s BLOG and see more of his articles that are not on NPN, as well as his other Photo Blog pages, and a Gallery of the Fine Art Images that he sells at www.impressions-of-light.com.