Photographing Without a CameraText and photography copyright Rod Barbee. All rights reserved.
You probably think I’m kidding. I’m not - I do this all the time. Whether I’m on a photo outing or just going about my regular life, I’m always looking at the landscape with compositions in mind. But when I am on a photo outing I still photograph without my camera. That is, I find my photographs first, without my camera in hand.
This is one of the most valuable lessons I ever learned. Most people will jump out of the car, grab their gear, and set up right away, extending the legs of their tripod and mounting their camera. It’s my guess that the very best spot for the shot is usually not right next to the car. I’d like to suggest that you first find your photograph without your camera in hand. Wander around to find what you’re looking for. You’ll be unencumbered by all your gear and you’ll be much more flexible and efficient in finding the optimum spot from which to photograph. Plus, because now you’re light and flexible, you’re likely to find many more interesting possibilities.
Once you think you’ve found a good place to shoot from be sure to mark it somehow. Leave a hat, a stick, or make a scuff mark in the dirt. Next, go get all your gear. Once you get back to your spot, set your tripod somewhere out of the way. Grab your camera and a lens and this time go find your shot in the viewfinder. By handholding the camera, you’ll easily be able to move around, change vantage points, and bend down. The advantage of going about it this way is that your tripod won’t bog you down. What’s likely happen is that you’ll find an incredible shot that you just have to have, a shot that you wouldn’t even have contemplated if your camera was stuck on the tripod, a shot that makes your heart race, a shot that will be the defining moment of your existence. OK, I might be getting a little carried away here. However, this will be a shot that may challenge you to get your tripod into the right spot. And this is where things get interesting and frustrating. Your tripod may not be tall enough. Your tripod may not get short enough. Your tripod’s legs may not be able to get into the positions needed for the shot.
But you’ve seen the shot through the viewfinder and you won’t settle for less.
This is both the advantage and disadvantage of finding your shots without the tripod. By freeing yourself from the constraints of your tripod you’ll be stretching yourself and your tripod. You’ll be finding new and exciting images but you may also discover that your tripod isn’t up to the job. This could cost you money (I love spending other people’s money). But you’re in the field and even B&H can’t provide “next minute” delivery so you may need to come up with some creative ways to help your tripod get to where it’s needed. I’ve used rocks and logs. I’ve brought my tripod legs close together to get those extra couple inches of height. I’ve laid my tripod down on the ground. Whatever it takes. Once you’ve got your tripod where you need it, and your tripod head adjusted just so, be sure to lock down your composition. What I mean is to tighten your tripod head so your composition won’t change. If you’re using your camera’s matrix, or evaluative, metering, you can just make your settings and take the shot. If you’re like me, however, and like using the spot meter to evaluate the scene, use your quick release and take the camera off the tripod. Since you’ve just spent the last several minutes getting your tripod and head in just the right place, do you really want to loosen things up to meter around the scene and risk messing up your masterpiece? Just take the camera off the tripod to meter. If you don’t already have a quick release system then I’ve just spent some more of your money.
Besides learning to be a tripod contortionist, one thing that will definitely happen is that you will become a better photographer. Because you have seen the shot and you won’t settle for less, you’ll not be making the same easy pictures from the same easy spots as every other photographer. You’ll be expanding your vision and you will be finding images that are uniquely your own; you’ll begin defining your own style.
Comments on NPN nature photography instructional articles? Send them to the editor.
RB-NPN 0933
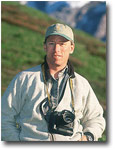 Rod Barbee is a professional photographer, writer, and instructor. He is a regular contributor to Outdoor Photographer magazine and has also been published in Nature’s Best magazine, Audubon and Mead calendars, Northwest Travel and Oregon Coast magazines, Orvis clothing catalog, the National Park Service, and more. Several of his images appear in the Amphoto book “American Vision”. His first book, The Photographer's Guide to the Oregon Coast, co-written with with David Middleton, is available nationwide. Rod Barbee is a professional photographer, writer, and instructor. He is a regular contributor to Outdoor Photographer magazine and has also been published in Nature’s Best magazine, Audubon and Mead calendars, Northwest Travel and Oregon Coast magazines, Orvis clothing catalog, the National Park Service, and more. Several of his images appear in the Amphoto book “American Vision”. His first book, The Photographer's Guide to the Oregon Coast, co-written with with David Middleton, is available nationwide.
Rod has taught nature photography through Bellevue Community College in Washington state, The Mountaineers in Seattle, Olympic College in Bremerton, WA, The Great American Photography Weekend workshops, and Olympic Mountain School of Photography. He is also a contributing editor to Naturephotographers.net, an online photography magazine.
The natural beauty discovered during backpacking trips into Olympic National Park led him to nature photography. It has since become a passion in his life from which he continues to learn and grow.
Rod and his wife Tracy Rowley live in Port Ludlow on Washington’s Olympic peninsula.


|