 |
Why Print Your Own Work?
Text and photography copyright © Alain Briot. All rights reserved.
1 - Introduction
The question sounds ludicrous and in a way it is; but it is a question I was asked and therefore it is a one that is obviously on the minds of some people. In a way, this question points to a deeper problem - a problem that I would describe as a certain lack of knowledge of the digital photographic process in particular and of the artistic process in general. For this reason I decided to write an essay on a subject that I would, otherwise, have brushed off to the side as irrelevant and a waste of my time.
Ludicrous it may be. To write about it may be as well. After all, I could have other people print for me. And, since I work with digital photography, it is possible, though erroneous, to think that my work ends when the master file is complete and saved to disc.
But, the question that is the title of this essay also leads to a second one - a question about the exact nature of the creative process. To me, printing is an inseparable part of the creative act. As such, I have to do my own printing. For those who do not understand why, and for those who are curious to read what I have to say on this subject, I wrote this essay.
2 - A Complete Process
As I just said, the answer to the question that is the title of this essay seems self-evident: I print my own work because I enjoy it and because for me it is part of the act of creation. In fact, mounting, matting, curating and framing are also part of the act of creation. Together, they are the logical outcome of the printing process. And yes, I do all of this myself. In other words I enjoy the entire process - from taking the photo to hanging it on the wall, including each and every step in between.
This is therefore a long and complex process. So much so that I created a tutorial DVD in which I detail the entire process from scan to matted piece. During the creation of this DVD I found that I perform a total of 28 main steps. Furthermore, each of these steps includes sub-steps - steps that are either alternative approaches, or steps that consist of several parts. In all, there are over 200 steps total, though I do not use all of them on every piece that I create.
At any rate, for me the act of creation does not end when I have a finished Photoshop file ready to print. What ends is this part of the process, which in my step-by-step approach is about step 16. But even then, to say that this step is over is inaccurate. More accurate is to say that this step - which I call image optimization and enhancement - is over, for now. Later on I may, and often do, decide that I want to make changes to the image. If such is the case I will re-work the part aspect of the image associated with this step.
3 - Why Not Have Someone Else Print?
The question "why print your own work?" while at first seemingly superficial is, upon closer inspection, legitimate. In the darkroom days, for black and white fine art photographers, printing your own work was a given. The audience expected it and the artists considered it one of the most important aspects of the craft. A printing "recipe" was created through test prints - a recipe that was written down in notes only the photographers could understand. Then, each time this specific negative was printed, the recipe had to be re-enacted so to speak. Because this recipe was often complex and featured several steps, not unlike my own approach to digital processing, and because so many variables came into play: developer temperature, exposure times, timing of multiple dodging & burning operations, etc., no two prints were totally alike. Finally, a certain number of prints had to be regularly discarded. These were either "practice" prints done at the beginning of a session, prints representing what we might consider to be the equivalent of a "warm up" exercise, or prints made with the expectation of being final prints but during the creation of which something went wrong.
With color darkroom printing things were similar except that the higher cost of color printing equipment, the much tighter temperature range color chemicals had to be kept at, the fact that all printing operations had to be conducted in total darkness, and the fact that color and contrast control were fairly limited when compared to black and white, meant that only a few fine art chemical color photographers printed their own work. Most color photographers relied on professional labs catering to many photographers to print their work. Sometimes, these artists worked first with a master printer who was employed by the lab with the goal of achieving a recipe for a fine art test print, then had a number of prints made to match the test print. Other times, they trusted the lab technician to make appropriate choices regarding print tonality and color fidelity.
Things are quite different today with digital processing. The recipe that used to be created in the darkroom is today completed on the computer, then saved as a final file called the Master File. Once this is done, the recipe does not have to be re-enacted each time the photograph is printed. All that needs to be done is to print the master file, in what neophytes consider to be an automatic process. After all, all that is required (or so the neophytes believe) is to send the file to the printer. Unfortunately, things are not exactly this simple; not at all in fact. Eventually, as we will see, except for the absence of chemicals, though much has changed technology-wise things are not that different today practice-wise.
To prove this point, let us look at the nature of the digital process as a whole. First, one must consider the constantly changing state of digital technology. New printers, new papers, new profiles, new software, new inks and just about new everything are constantly being introduced. Since each of these elements is part of the chain that constitute the print recipe developed during the creation and the initial printing of the Master File, altering one of these elements means altering the recipe which, in turn, means making a new test print and most likely making adjustments to the Master File.
In the 10 years that I have been working with digital processing in a professional situation (meaning making my income from print sales) I have had to adjust my files prior to printing more times than I can remember. I definitely have to do it each time I use a new printer or a new profile or a new paper. I also have to do it often when a new software package is released or updated. In itself, new software does not cause changes to the output, unless it is printing software (such as a new RIP, or Raster Imaging Processor, which is software used solely for the purpose of printing your work). However, new software means new, and usually enhanced, capabilities. This means that there is the possibility of improving the "final" Master File which turns out not to be so final after all.
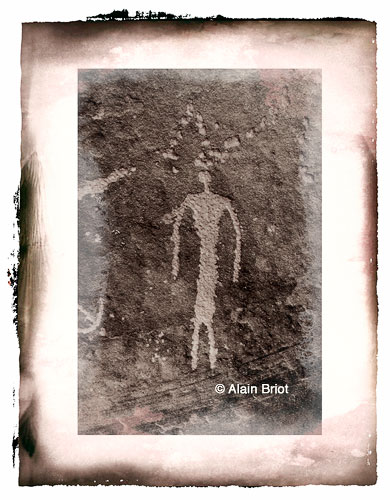
Kyaatataypi Solstice 1
One of several images from a series of 17. All the images in this series were printed on watercolor paper with a deckle edge around the print borders.
|
With new raw converters this often means reconverting the original raw file, and then re-optimizing the image and creating a new Master File. In turn, this new Master File has to be test-printed, modifications have to be made, a new profile and a new paper have to be chosen, and other aesthetic decisions have to be made. Not to mention the fact that my personal taste for how this image should look may have changed. In other words, all of a sudden making a print turns out to be a whole lot more complex than just sending the file to the printer by pressing, "return" on the keyboard.
Nevertheless, with the optimization done to my satisfaction, and all changes due to new software and hardware having been completed, I am now ready to print. One could say that I could turn the process over to an assistant, or to a printing bureau. However, this would not be satisfying to me. First, I need to test-print each image, and often I need to make adjustments to the file after seeing the test prints. Second, I like to choose the type of paper I print on very carefully. In fact, I regularly print the same image on different types of paper as time goes by and as new papers are being introduced. Third, I love to see the prints come out of the printer. To me, this is almost as magical as seeing a print come alive in the developing bath.
Fourth, I like to curate the print: trim the edges, let the print dry, sign, emboss my stamp, spot the image, etc. Fifth, I find that I reach a higher level of quality when printing myself by watching out for things that a printing bureau might overlook. Sixth, I love doing it all myself. Seventh, I save time by not shipping prints to a service bureau. Eighth, I believe it is my responsibility to print my own work. Just because I could ship the file to a lab does not mean I should. I printed my own work in the darkroom and now I print my own work in the digital darkroom. To me, this is the way things should be. Ninth, I can experiment with each print and refine the printing as much as I want.
Tenth, the technology is now there to enable me to have my own digital lab at home. In the beginning, about 10 years ago, a wide format fine art inkjet printer cost over $100k. Today, the finest wide format inkjet printers cost around $5k. Why not own and use a technology that has not only become affordable but that has also been perfected to the point of delivering prints that delight the most demanding photographers? Eleventh, I believe I can do a better job than a printing bureau. Twelfth, given how picky I am when it comes to printing, it is a lot easier to do the job myself than to have someone else do it. I would have to explain too many things to them, I would drive them nuts and changing my mind about new choices each time a specific image is printed, and I would waste a lot of time in the process.
Certainly, digital printing is faster than chemical printing. For one, there is no need to mix up chemicals, pour them into trays, control the temperature of each tray, replenish the solutions, and empty and clean both trays and darkroom after the day's printing is done. There is also no need to wash prints for several hours, and there is no need to hang wet prints to dry. However, there is a need to let inkjet prints "de-gas" meaning let them air either flat or hanging so the wet inks can release all the gases contained in the ink solution. This is necessary so that once the print is matted and framed none of the gases trapped in these solutions will be deposited onto the inside surface of the framing glass or Plexiglas, or onto the inside border of the mat, or onto the vellum tissue that protects matted prints.
Digital also means that the storage of papers and chemicals can be done at room temperature and in full light. With chemical supplies, paper had to be kept in lightproof bags and it was a good idea to keep unused paper refrigerated. Chemicals were less of a problem but they did have a finite life span. Although no expiration date is indicated on boxes of inkjet paper, the paper still must be used within a year after being purchased, as the receiving layer - the paper coating on which the ink is deposited - loses its effectiveness over time, resulting in lower-than-optimal-quality prints.
All in all, and while digital printing is faster than chemical printing, essentially due to the fact that no chemical processing is required, there is still a multitude of small details to attend to and to keep in mind. For example, it is necessary to agitate ink cartridges before use when your printer has been unused for some time (let's say 2 weeks or longer) because pigments that should be floating within the ink solution tend to fall to the bottom of the cartridges over time, thereby reducing the percentage of pigment in the ink solution sent to the print head. In turn, this results in a measurable loss of dmax (maximum density), or of color saturation, on the print. It is not a huge reduction, but in a carefully controlled workflow in which the goal is to create sophisticated prints through precise controls of color and contrast, such a change can be noticeable, especially if it is added to other small defects in other areas of the workflow. Each of these problems may be small, and in itself may remain barely noticeable, but when added together they amount to a significant difference, the origin of which is very difficult to point out because it is, after all, to be found not all in one place but in a multitude of small mistakes.
4 - The Theory and the Real World
Eventually, what we are talking about here is the difference between chemical and digital printing. Obviously, no one would have asked Ansel Adams if he did his own printing. The reasons why he did were obvious. In short: he printed his own work because nobody else could print it better. With digital processing, the reason why artists print their own work remains the same. However, the reasoning behind this answer is not so obvious. After all, or so the neophyte believes, once the master file is complete any one can press the print button and make a print.
Or so it seems. Let's suppose that someone wants to make a print without the photographer being present. Maybe this is several years after the photographer passed away, or maybe this is simply because the photographer isn't there for any number of reasons.
First, one needs to have the knowledge of how to send a file to the printer with the proper choices and profiles, and make all the other necessary settings so it prints correctly. This isn't something that everyone knows. In other words, just that part alone requires training. But furthermore, and provided the person doing the printing (other than the photographer) has that knowledge, they need not only to make the proper settings, but to make the exact same settings than the photographer made. These settings are very rarely written down or saved. The exception to this rule would be when printing with a RIP because this type of software can reconstruct a previous print job provided none of the files have been moved, something which basically means that the same computer, with the same exact file structure that the photographer designed, has to be used. The files have to be saved in the same location, the correct profiles have to be present in the same folder and so on. Not necessarily something easy to do. Once one thing is out of place, the puzzle is mixed up and things are no longer automated.
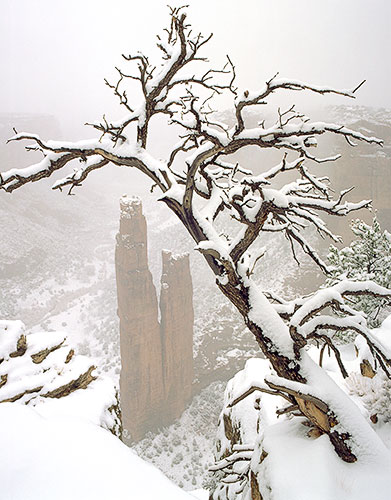
Spiderock Snowstorm
I created this image nearly 10 years ago, at a time when digital imaging was still in relative infancy. Because a large part of the image is pure white, precise color control is critical to the creation of a successful print. As printer, software and my personal skills improved, I was able to make significant changes to the print quality, until I was satisfied that I have a print that is neutral in the white tones and yet conveys the feeling of fresh snow, cold weather and snow-filled canyons that I experienced when I created this image.
|
And this is just to send the file to the printer. What about paper choices? First, one has to know what paper to use. Simple enough, it may seem. But again, paper choice is a complex decision, one that generates endless discussions among photographers. And then there is the question of whether or not this paper is still available. And there is also the question of whether or not new batches of paper have the same technical characteristics as the batches the photographer originally used. If not, a new profile has to be made. The problem then becomes how to create a profile that gives the same print quality as the profile used by the photographer. Doing this is going to be difficult without the aesthetic input from the photographer because, eventually, the choice of one top quality profile versus another top quality profile is usually done on the basic of aesthetics.
hen there is the issue of inks & printer. Is the printer used by the photographer still available? Are the same inks available? If the photographer used a RIP, is the RIP still available and does it run on the current software and hardware or do we need to use a "historically correct" computer?
Finally, what about curating, mounting and matting? After all, it is too often assumed that the printing process ends when the print comes out of the printer. While a print may be sold as-is, straight out of the printer, the fact is that nearly all photographic prints are sold mounted, matted and possibly framed.
Curating is an often-overlooked aspect of the photographic process. Not only does curating involve many steps, it also involves some of the most delicate steps. Trimming the print, although apparently simple, offers many opportunities to damage the print. Spotting is sometimes required on inkjet prints when paper flakes out revealing a white spot where color or shades of gray should be present. Finally, the use of an embossing chop, a logo embossed into the paper by the photographer, has become popular among photographers printing on watercolor paper. To make an exact duplicate of a print the original embossing chop used by the photographer would have to be available. If it is not, then a copy of it would have to be made. Here too, making a copy of an embossing chop is not easy.
In that respect each photographer has his own approach to curating, mounting and matting. The value of a print, in fact, is in part based on whether the print is loose or matted and mounted. A matted and mounted print has a higher value.
Many possibilities exist regarding matting and mounting, and each photographer makes slightly different choices in this regard. For example, a matted print can be dry-mounted to a backing board and signed under the print, onto the backing board, or it can be hinge-mounted onto a backing board then over-matted with a hinged mat. It can also be dry mounted then hinge-matted.
Personally, while I use the presentations I just mentioned, I also present some of my prints in decorated mats. Some of these mats have intricate cuts done on my Eclipse computerized mat cutter. Other mats are cut on a laser mat cutter and include custom designs that are created in CAD software. In the instance of particularly complex mats, I go into just about as much trouble to cut the mat as I do when I optimize the image. In this instance, if one wanted to recreate one of my mats, they would have to have access to the same computerized or laser mat cutter. They would also have access to the same software and to the same corner and mat designs.
Another curating approach is creating a deckle edging along the print border. In this approach an irregular edge, mimicking the look of hand-moulded paper, is created around the borders of the print. Certainly, anyone with the proper knowledge can create a deckle edge. But acquiring this knowledge isn't exactly obvious. Creating a deckle edge similar to the one created by the photographer is even less obvious. After all, deckle edging is a totally manual process, a process during which manual dexterity, aesthetic choices, the use of specific tools, the pressure applied to the paper, and even the humidity level of the paper all play a crucial role towards creating the final look of the deckle.
Finally, there is the issue of the signature. Obviously, if the photographer isn't there he won't be able to sign it. Some galleries have solved this problem by having an embossing stamp of the photographer's signature made. However, while it does have a definite aesthetic appeal and does offer an alternative to an original signature, it is not the same and the value of an embossed-signature print is far below that of an originally signed print.
5 - Let it Rip
You may ask why I personally insist on spending my time supervising the printing process of each print that comes off a 30-meter roll of paper. You may wonder if this is absolutely necessary.
After all, or so your argument may go, once I have edited the image, selected the paper and the appropriate profile, the amount of supervision required is minimal, is it not? I really don't have to insist on being there whilst the printer churns out print after print. Instead, I could be doing other things, like editing my next image or shooting new photographs while the printer is busy cranking out its thousandth print on its own.
Unfortunately, this is not the way I work. I print everything myself and I do printing and nothing else when I print. To let the printer work unattended is, in my view, asking for trouble. Nozzles can clog, cartridges can run dry and paper can jam. Printing therefore needs to be supervised to see if one of these things is happening. Because of all that can go wrong I get fairly nervous when I print and find it difficult to do much of anything else except menial tasks. Some may be able to let the printer work and move on to creative endeavors. I cannot do that because it simply isn't me. In my situation, printing is THE creative endeavor. Therefore the more prints of one image I make, the less time I have to make new images.
I simply can't imagine going out on a photography expedition while my printer is working unattended. Long paper rolls cannot simply unwind on the floor. If they do, prints get scratched. One has to cut each print as it starts to reach the floor, or stretch the print in front of the printer so it lays flat and the image faces up. There is a length limit when doing so (the distance available in front of the printer) and when the limit is reached the printer has to be paused, the print cut off, and the printing resumed.
Finally I often print on loose sheets of various sizes. When working with the Epson 9800 only one sheet can be loaded into the printer at a time. With the Epson 4800, I can stack about 20 sheets, but feeding problems occur regularly and have to be taken care of or the printing is paused and nothing happens until the problem is fixed. Then there is the need to re-stack sheets in the sheet tray. All this is only part of a much longer list. There is more but this essay is getting extremely long already.
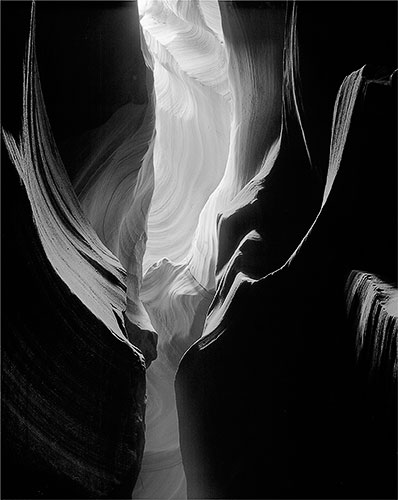
Antelope Canyon Black and White
Many images often look equally nice when printed on glossy or on matte paper. The final choice is as much a matter of taste as it is a matter of technical perfection. Over the years I have printed this image on a number of different papers, with equally good results. Even though I am the author of this image, I would be hard pressed to say which of these papers gives me the "best" print.
|
6 - Conclusion
Why make my own prints? Because I make changes to the image over time. In other words, my prints of the same image are not all the same. They change over time. Why do they change? Because my vision for each image changes. This vision gets refined, enhanced, more precise.
Why make my own prints? Because my skills improve, or the equipment and the software improves, and in turn the print quality increases.
Why make my own prints? Because, my goal is to improve the quality of the print as I go, with the final purpose being the creation of the finest print I can create. Whenever the opportunity to increase print quality comes up, I take it.
You may say that I complicate the process unnecessarily, that I make it overly complex, longer than it really is, with far more steps than I actually perform when completing one of my own pieces. Not at all. The evidence? First, you can take my word for it. Why should I lie? Second, I invite you to watch me work completing a piece from start to finish, for example by watching my Printing Mastery Workshop on DVD in which I detail, through 200 movies, audio and PDF files, the exact 28 steps and multiple sub-steps I follow to complete each of my pieces.
What I am pointing out here is that to the inexperienced eye, to the beginning photographer, to those who do not have the same focus on quality that I have, to the neophytes, the process I follow may seem overdone and unnecessarily complicated. But when you do this professionally, with as goal the creation of the highest quality print possible, this process becomes a requirement rather than a luxury.
While I can't speak for others, I do know for a fact that I am far from being the only photographer who goes into this much trouble to create prints that make me happy when I look at them. I also know that some photographers go to a greater level of trouble than I do. Eventually, we all have our own unique approach. However, what we do share is the belief that completing the entire process by ourselves is important. And if something has to be delegated, I have to say that it will not be the printing. It may be the matting, or the spotting, or the trimming, or even the drying of the print, but it won't be printing itself. In fact, with my work, while I do all the printing, I leave the trimming, spotting, matting and mounting to Natalie. When these steps are completed, I sign the print, number it if it is a limited edition, and that's it. In other words, I delegate what happens after printing to Natalie, and in that sense Natalie becomes part of the process because she is extremely knowledgeable and has developed the necessary expertise to complete these other steps.
In the end, asking why I print my own work is similar to asking a painter why he paints his own canvases, or a writer why he writes his own books. Because they are my work, that's why, would be the answer. Because there is no other way that I can conceive of doing this! Because it wouldn't be honest to do it any other way! Because only I can do it.
AB-NPN 2054
Comments on NPN digital photography and imaging articles? Send them to the editor.
Alain Briot lives in Arizona and leads workshops to Navajoland several times each year. His current workshops listing is available on his website at http://www.beautiful-landscape.com.


|

