|
|
I have been wanting to review OnOne’s PhotoSuite for a long time. I have seen many images that were worked on using PhotoSuite 7, but I did not realize just how powerful this program is. I started out book-marking as many of the online tutorials as I could find to learn how, and what all can be done with it, but before I even got through watching two of them I realized that PhotoSuite 7 has way more than I had ever expected. OnOne Software has a whole collection of tutorials to learn from, and so far I have only saved up to Episode 31 - OnOne University has over 100 tutorials, and they are all free. No user will ever have a problem learning how to use this great imaging software.
PhotoSuite 7 comes in three editions, Standard, Lightroom & Aperture and the Premium editions. Since the Premium edition is the most powerful of the three, and the one I have, that is what this review will cover. PhotoSuite 7 comes with seven modules in which you do all of the work. These modules can be bought as individual programs, but I suggest getting the whole Premium package and save. The modules include Layers, Mask, Portrait, Effects, B&W, Focus and Resize. The Layer is the first module you will use to open an image, as well as doing any layers work you have in mind. Each module is selected from the bar at top right.
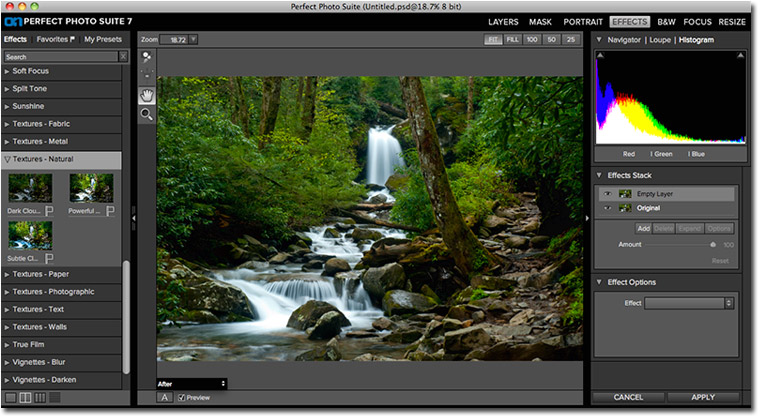
Illustration 1
The Effect module is the one I use the most and it comes with a whole group of presets that you can pick from, and then refine as needed with the option tools on the right (illustration 1). You can also create and save your own presets for later use. When opened you get a preset group (on the left) and as you pick on an effect it opens a group of selections with each effect being applied as you pick it, and the adjustment sliders open at the same time on the right side. Above the effects option tools is another box that has a histogram display, which includes selectors to show any clipping of both the highlight and shadow areas. At bottom left, under the image, you have an option for five additional window displays for side-by-side, before & after images.
For the Mask module you get another powerful window of tools that allows you to paint in (or out) any area you want to make a mask of, by selecting either an image area, or a selected color. There are also brushes to keep, or drop colors, and a refine brush, and color spill brush for when you are about done.
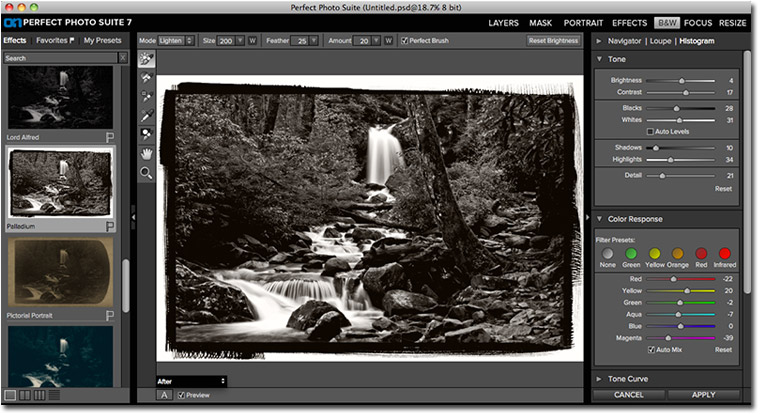
Illustration 2
My other favorite module is the B&W because I love converting many of my color images into fine art B&W images to print & sell, and this module does a super job of that. In illustration 2 you can see what my color Smoky Mountain stream shot turned into when I applied the 'Palladium' preset to it, and then adjusted that with the option sliders on the right. I especially like the 'Color Response' box because it works just like B&W film would react when you use different color filters on the lens (like in the "old days"). I then fine-tuned the image with the sliders in the 'Tone' box. Under these two option boxes, as you scroll down the window, are 7 more options to choice from including, Film Grain, Toner, Vignette, and Blending, plus others - I am going to be getting a lot of use out of this module for sure.
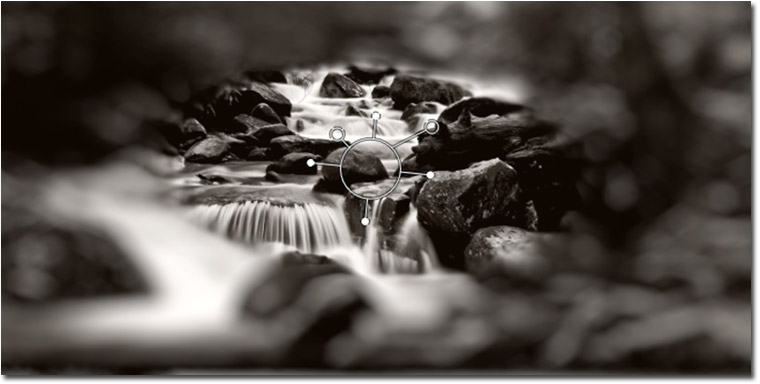
Illustration 3
The Focus module works a bit like a soft focus lens, but with much more control. Illustration #3 shows the selector you get over the image, and it can be enlarged, rotated, and twisted into all sorts of shapes and sizes to get exactly what you want for focus control. What is inside the selection stays in focus and everything else goes blurry, but even these you can control with more option boxes on the side.
The Resize module is the old Genuine Fractals resizing plug-in from the past, but souped up big time. You can not only fill in the size box, but you also get a selection of printing papers for it to conform to. I haven’t used this yet, but it does not look hard to use, and easy to learn about from one of the tutorials.
The last module is for Portrait work, and it is also very powerful for fixing, adding, and cleaning up an image to turn a good shot into one that will sell at first sight. This is another tool that I never use as I am not a portrait photographer, but I have seen a lot of what it can do. Right away as you open an image it looks for a face to work around. The module has effects to clean up skin tones, color correct, and work on eyes and mouth, and OnOne University has 18 tutorials just for portraits alone. You can get plenty of use from this tool just for use on family photos. You can check this out to learn more about that subject - www.ononesoftware.com/university/video/category/perfect-portrait-1.
PhotoSuite 7 Premium is one super package of tools that any photographer will get a lot of use out of no matter what they shoot. It will improve your images and increase your profits from whatever work you do. PhotoSuite 7 retails for $299.95 - an upgrade is $149.95 and can be ordered from www.ononesoftware.com/store.
There are a lot more features and goodies than I can cover in this small review, so check it out. You will not be sorry.
Paul Faust - NPN 1680
|
 Paul W. Faust is a self-taught Photographer, Writer, Digital Imaging, Photo Restoration, and Photo Stock Service professional. You can see more of Paul’s images on the web gallery where he sells his images at www.paul-w-faust.artistwebsites.com.