Editor's note - This article first appeared in the Sept. 2001 issue of Outdoor Photographer magazine.
One of the most overlooked tools at the photographer’s disposal is the depth of field preview button. I’ve been teaching photography for a number of years and what I usually hear is something like this: “This button just makes everything darker, it’s useless.” I’ve heard this many times from beginning as well as experienced photographers. The first part of what they say is true but the second isn’t; they’ve yet to discover the many uses of the depth of field preview button.
Not all cameras have one and if you’re new to photography, you may not even know what it is. When you look through your camera, what you see isn’t necessarily what you’ll get. As you probably know, as you look through the viewfinder of an SLR camera, you’re looking through the lens at its widest aperture setting, which may or may not be the aperture chosen for your picture. By pushing the preview button, the lens closes down to the shooting aperture. This way the photographer can view the depth of field of the final image. However, when the aperture closes down, less light comes through the lens and the viewfinder can get very dark. This makes details hard to see, especially if a small aperture opening is used. This is also where many photographers give up on using the DOF preview button. As you’ll see, you don’t always have to use the DOF preview button at f/22 nor do you always need to see every detail.
Beyond making “everything darker”, the DOF preview button has several practical uses;
|
- Detecting hotspots. When doing close-up and portrait photography, one of the prime concerns is the background. Bright spots are very distracting but they can go unseen when viewing the image while the lens is wide open. When you push the preview button, the viewfinder will get dark. But that’s OK; it makes it easier to detect any distracting hot spots that may end up in the final image.
- Detecting dark spots. Just as hot spots can be distracting, dark spots, especially in the foreground of landscape images, can be just as distracting. To get the maximum depth of field, many landscape photos are made at an aperture of f/16 or f/22. When previewing with the lens set to f/22, the viewfinder will get dark, maybe too dark to tell what’s really going on. By previewing at f/8 or so, the lighter areas stay relatively light, but the darker areas become readily apparent. You’ll be able to see where shadow areas in your foreground might be too dark for the film or sensor to record. You can then decide if fill-flash, a reflector, or perhaps a different composition is appropriate to eliminate these shadow areas.
- Detecting unwanted elements (or “Intruder alert”). How many times has your film come back from the lab with some out of focus branch or blade of grass sticking part way into your frame? You can stop this from happening by using your preview button before you trip the shutter. When you preview the depth of field, run your eyes around the edges of the frame and look for intruders trying to poke their way in and ruin your image. Look for intruders trying to sneak into your backgrounds. Remember, you may not notice these things while looking through the lens while it’s wide open because of the shallow depth of field. Use your DOF preview button and catch these intruders. Again, the viewfinder will get dark but you’re not trying to see all the detail in the image, you’re just looking for intruders. Sure, you may be able to clone them out later, but it takes less time to remove the intruder while in the field than it does to clone it out in Photoshop.
- Finding the best background. Especially when doing close-up and portrait photography, hold down the preview button while changing the aperture until you get the best combination/compromise for a pleasing background and the focus needed for your subject.
- Placing a graduated neutral density filter. Grad ND filters are essential to successful landscape photography but they need correct placement so that their use isn’t obvious. Hold down the preview button while moving the filter in front of your lens. This will make placement easier and more precise.
- Optimize the range of focus for your main subject. Whether photographing wildlife or wildflowers you can use the preview button to see if everything you need to have in focus will be in focus, from the stamens and stigmas on flowers to the nose and eye of an animal.
- Visualize underexposure. By looking at a scene through your viewfinder and setting the lens one or two stops smaller than the widest aperture on your lens, you can use the DOF preview button to get an idea of what an image might look like if you underexpose it a little. You may want to underexpose to create a different mood and this will help you see what that might look like. Conversely, you can set your lens to f/8 or so and push the button, let your eyes adjust, and then start opening the lens to get an idea of what overexposing a scene might look like.
- Detecting lens flare problems. This is similar to detecting intruders. When photographing into the sun, especially when the sun is low in the sky, you run the risk of lens flare, which results from direct light bouncing around the elements of your lens. By previewing the scene, lens flare will become more apparent. You can then decide if you want to do something to mitigate it, like using a wider aperture, changing composition or shading your lens. You may find that you like the effect. You can also preview the “star burst” effect that results from using small aperture openings with wide angle lenses while including the sun in the image.
- Detecting vignetting from stacking filters and lens hoods. With wide-angle lenses, there’s a greater risk of vignetting, or cutting off the corners, while using filters, especially if you stack filters or put your lens hood on the filter. By previewing and paying special attention to the corners of the frames, you’ll be able to know ahead of time if there will be a problem. (Be aware that most viewfinders only show about 90-95% of what will end up on film. If in doubt, be sure to run tests with all combinations of filters you may wish to use. Photograph a blank wall or the blank sky and evaluate the resulting images.)
- Use the DOF preview button as a compositional aid. This may just be the most valuable tip of the bunch. More and more I find myself using the DOF preview button to aid in my compositions.
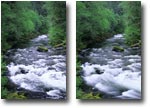
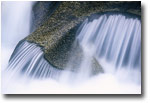
As a compositional aid, and regardless of what f/stop you use for the final image, set your aperture to f/16 or f/22. This makes the dark areas darker and yet the bright areas stay relatively bright. It also eliminates much of the detail, leaving behind only forms and shapes, light and shadow. In other words, it reduces everything to graphics. You can then arrange these graphics in a pleasing manner. This works especially well when you’re working with light and shadow or moving water. It’s hard to predict what moving water will look like in the final image, especially if you’re shooting film. This technique gives you a better idea of how the white areas of moving water will flow through the image, allowing you to arrange lines, curves and other graphic elements.
As far as dealing with a darkened viewfinder, letting your eye adjust is probably the first thing you should try. There are several techniques to help with this. First, don’t start with your lens at its smallest opening; hold the preview button down and close down your lens gradually. On newer cameras, this may not be possible. Second, use an eyecup to help cut out stray light. Third, throw a jacket or dark cloth over your head like the users of view cameras do.
The depth of field preview button can do much more than just strain your eyes. Being a photographer who prefers to get the image the best I can while in the field, I find the DOF preview button an essential tool and a must have for any camera body I own. If your camera has this valuable feature, be sure to use it to its fullest.
Comments on NPN nature photography instructional articles? Send them to the editor.
RB-NPN 0933
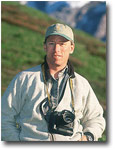 Rod Barbee is a professional photographer, writer, and instructor. He is a regular contributor to Outdoor Photographer magazine and has also been published in Nature’s Best magazine, Audubon and Mead calendars, Northwest Travel and Oregon Coast magazines, Orvis clothing catalog, the National Park Service, and more. Several of his images appear in the Amphoto book “American Vision”. His first book, The Photographer's Guide to the Oregon Coast, co-written with with David Middleton, is available nationwide.
Rod has taught nature photography through Bellevue Community College in Washington state, The Mountaineers in Seattle, Olympic College in Bremerton, WA, The Great American Photography Weekend workshops, and Olympic Mountain School of Photography. He is also a contributing editor to Naturephotographers.net, an online photography magazine.
The natural beauty discovered during backpacking trips into Olympic National Park led him to nature photography. It has since become a passion in his life from which he continues to learn and grow.
Rod and his wife Tracy Rowley live in Port Ludlow on Washington’s Olympic peninsula.