Coastal Exposures |
As a landscape photographer, there are few experiences comparable to walking out on the beach in the dawn’s faint light, examining the sky, the clouds, the mood of the surf, and anticipating what the next hour might bring.
What is it, exactly, that repeatedly beckons the photographer back to the edge of terra firma time and time again? Is it some visceral, primal urge to “go back from whence we came,” as John F. Kennedy once speculated about the kinship of human beings and the sea? Or is the seemingly boundless ocean a visual metaphor for the infinite photo possibilities offered the photographer? How about the local seaside tiki bar that serves up a kaleidoscopic array of boat drinks with miniature umbrellas during the idle light of midday?
Whatever the reason - or excuse, coastal landscapes are a favorite subject for many nature photographers, including myself. So with a nod to the advent of summer and the unofficial start of beach season, here are a few tips for better coastal landscape photography in any season.
Find a Point of Interest
Beaches are often non-descript, featureless expanses of sand and endless water without any apparent focal point. With no obvious visual fixture, the scene might leave a photographer confused and potential viewer of the image bored. Locating a conspicuous geological feature, rock, tree, tidal creek, piece of driftwood, or serendipitous conch shell in the foreground can provide a visual anchor that makes for a more compelling image.
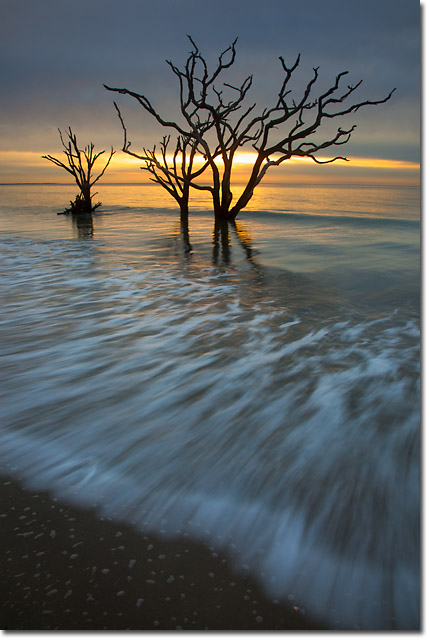
These submerged trees make a great point of interest and are a visual anchor for the image.
Botany Bay, South Carolina
Experiment with Shutter Speeds
The ocean is a dynamic body of water, heaving and churning with the ebb and flow of each and every wave. Photography is an interpretative art form, so the shutter speed you choose will greatly vary both the look and feel of the scene to potential viewers.
For example, a shutter speed of 1/250 of a second or faster can freeze the water’s motion, projecting a feeling of power or urgency. Any shutter speed of one second or slower can tame even the most furious ocean swells and ascribe a certain grace or fragility to the sea. A range of 1/20 to ˝ of a second with an advancing or receding wave or foam is a good compromise, giving water the illusion of motion yet retaining important detail as well.
The focal length, physical distance, and water’s velocity will all vary the visual effect of the wave’s movement for each shutter speed, so the examples cited above are merely rough guidelines. I think it’s important to experiment with a variety of speeds before ultimately deciding on what you prefer for each situation.
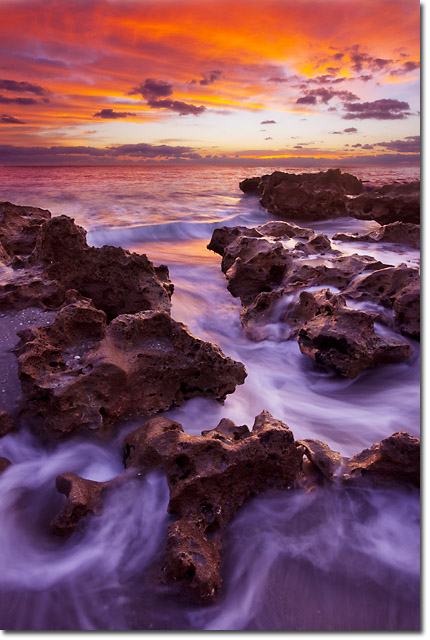
With a shutter speed of 1/2 second, the wave still retains important detail.
Jupiter Island, Florida
Look For Reflections
As mentioned earlier, beaches can seem featureless with little “working material” to assist in assembling a composition. Reflections in wet sand and tidal pools, however, can add some interest and depth to an otherwise ordinary scene.
Tidal pools and puddles can reflect the sky or clouds like a mirror if there’s little or no wind while the thin film of water left on the sand by a receding wave produces reflections that are both impressionistic and expressive.
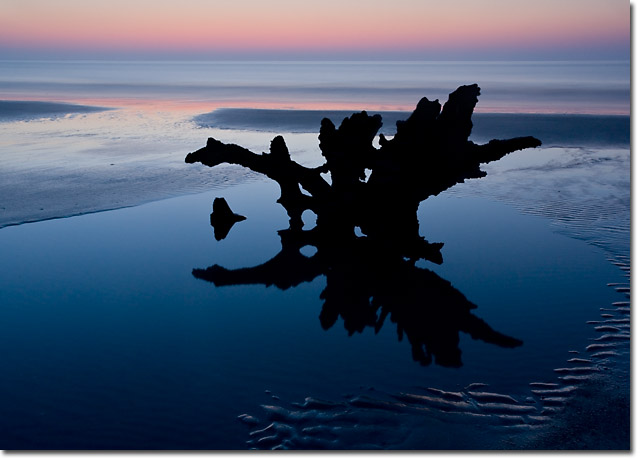
Look for still water reflections in tidal pools.
Hunting Island, South Carolina
Look for Patterns and Textures
Wind and water can conceive captivating dunes, mini dunes, ripples, ridges, and basins in the sand. These features can be used as a component of a larger, expansive scene or they can become the primary subject themselves. Look for conditions created by low-angled, directional lighting where the verge of light and shadow add yet more compositional elements with which to work.
These conditions can be difficult to visualize under flat or direct midday light. But as the angle of the sun becomes more oblique, textures, patterns, and lines will soon reveal themselves. Work quickly, as the light and shadows will be fleeting.
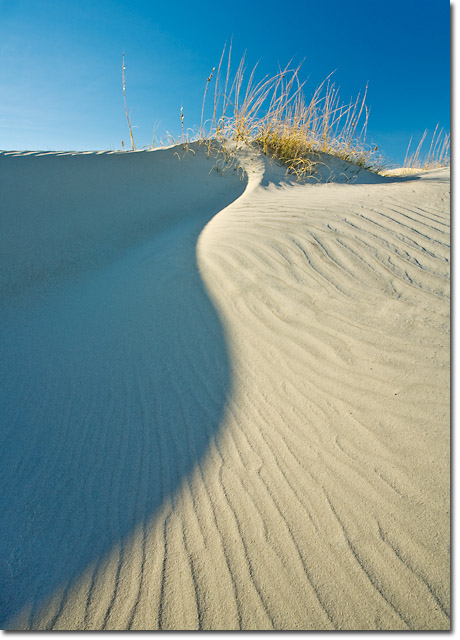
A verge of shadow and light creates an essential compositional aid.
Ocracoke Island, North Carolina
Arrive Early – Stay Late
This advice should be mandatory for any landscape photographer – coastal or otherwise. But does the world really need yet another photograph of the sun setting or rising over the ocean? My short answer would be, “Sure, why not?”
I prefer to bracket and blend exposures in post-processing for sunrise or sunset scenes that need usable detail in both the sky and foreground, but the level, unobstructed horizons are ideal for graduated neutral density filters as well.
But if beauty for beauty’s sake is too banal for your tastes, you still have the twilight wedge, dawn or dusk’s glow, and low-angled, warm sunlight during the golden hours to compliment the landscape. Snobbery is no excuse for sleeping in.
Protect Your Gear
The best advice I can offer with regard to keeping your gear looking and working like new: Take someone else’s camera to the beach.
Seriously, the saltwater, sand, and wind can run roughshod on your camera gear. Even if the camera is not dropped in the drink, saltwater spray and mist from the pounding surf can do damage over time. I always wipe down my camera and lenses with a damp, freshwater towel and let dry.
Tripods can become corroded and completely inoperable if the legs are submerged in saltwater. Since I cannot resist getting into the water myself, I carry an older, backup tripod on my coastal excursions and just go for it. It’s still a good idea to rinse the sand and saltwater off the tripod legs when you are finished shooting to extend its life as much as possible.
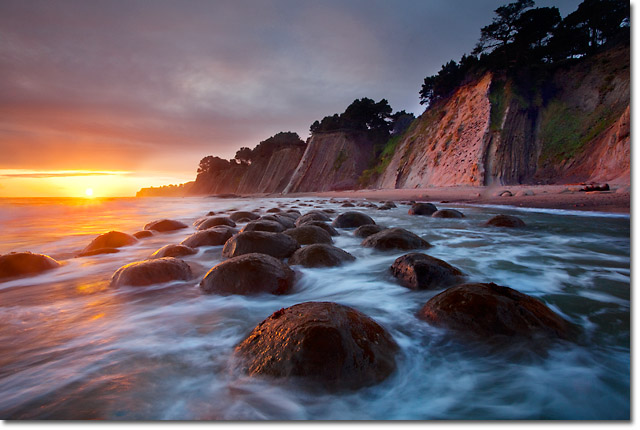
Getting this perspective required that I get wet. Real wet! I rinsed my tripod legs with freshwater after this shoot.
Bowling Ball Beach, California
Get Wet
Despite the previous point of advice, it often helps to get your feet and tripod wet in order get an interesting perspective. Wading into the water and getting a low angle to onrushing waves can provide a unique viewpoint while vicariously injecting the viewer into the scene.
Waves can move the sand and tripod during long exposures, resulting in soft images. For this reason, I push the tripod legs as deep into the sand as possible before an incoming wave arrives. This usually stabilizes the tripod and camera sufficiently.
Research Tide Information
Your favorite coastal photo locale has many different faces and characteristics, which all depend upon the height of the tide. Knowing when high and low tides occur and how they correspond to sunrise and sunset is vital to both your current approach and your planning for a future photography trip.
Tidal information can be found online. For the United States, http://www.saltwatertides.com/pickpred.html is a good place to start. A quick Google search for “tidal chart” and your area will produce several results with more specific locations.

iPhone screenshot of the Tide Graph application.
An excellent iPhone application is Tide Graph, which gives tidal information for hundreds of coastal locations, which can then be quickly accessed and deciphered
Comments on NPN nature photography articles? Send them to the editor. NPN members may also log in and leave their comments below.
 NPN Editor-in-Chief, Richard Bernabe has been a full-time professional outdoor photographer and writer since 2003. He's had thousands of publishing credits over the past 20 years and he regularly leads photography tours and workshops across the United States as well as internationally with Mountain Trail Photo and Creative Vision Workshops. Richard also offers regular Online Classes with NPN.
For more information about Richard's photography, be sure to visit his personal website, Richard Bernabe Photography.