This step-by-step tutorial will guide you on how to optimize your photos for web display using Photoshop Elements. If the only reason you are not posting to NPN is because you do not know how to get your photos ready for upload, now you have no excuse. Show us your work!
Step 1 – Open the image you want to share on NPN and make a copy of the image. Choose File>Duplicate Image. Close your original image.
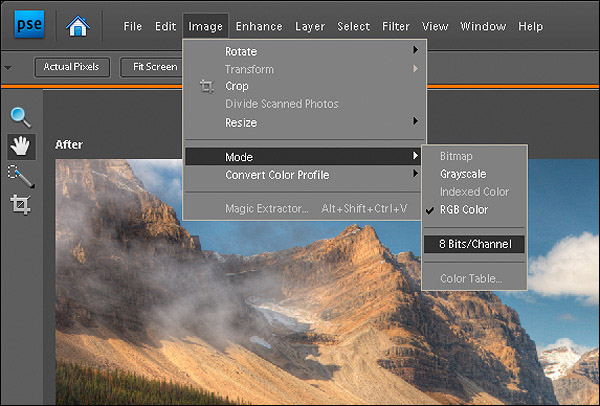
Step 2 – Photos posted to the web must be in 8-bit mode and web photos look best in sRGB color space. If you saved your image in 16-bit mode and in wide gamut color spaces like Adobe RGB or Pro Photo RGB, the next thing that needs to be done is to change the bit depth and color mode of the image to web friendly settings.
Go to Image>Mode and see if 8 Bits/Channel is checked or not. If it is not checked, then choose 8 Bits/Channel to change the bit depth from 16 bit. If the image is already in 8 bit, then the 8 Bit/Channel setting will be grayed out.
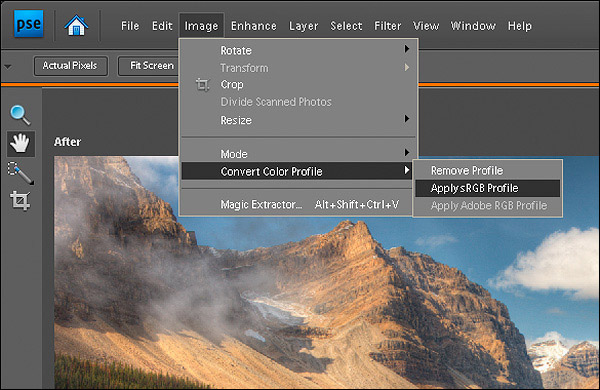
Now go to Image>Convert Color Profile>Apply sRGB Profile to get your photo into web color space.
Step 3 – Now you will resize the image for web display. Most photo sharing websites have guidelines about how large your image can be to be accepted on the site. For NPN, the guidelines are that images can be no larger than 720 pixels in the long dimension and be no larger than 200KB in size for the forums (except for the optional larger versions that can be 1200 pixels and 500 kb in size).
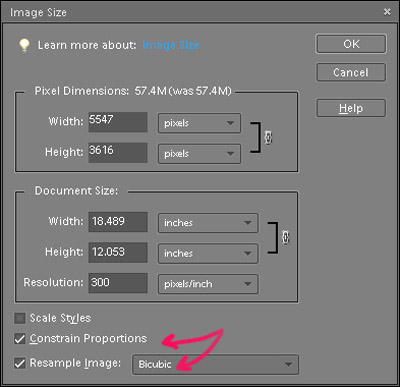
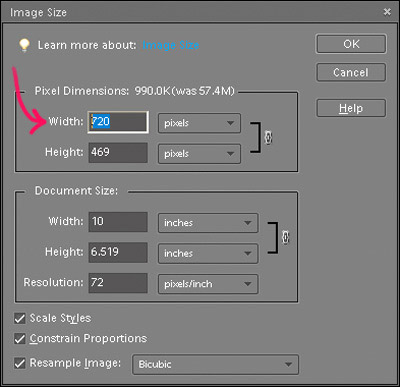
Go to Image>Resize > Image Size. Be sure to check the Resample Image checkbox and select Bicubic as the sampling method (Scale Styles will likely be automatically selected as well which is fine).
In the Image Size dialog box first change the Resolution setting to 72 pixels per inch.
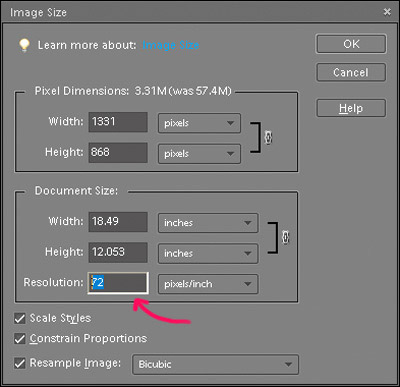
Now under Pixels Dimensions, change either the Width or the Height, whichever dimension is longest, to 720 pixels. Click OK. Your image will shrink down very small. To see the photo larger for the next step press the Actual Pixels button in the upper left hand corner of the program.
Step 4 – Now you will sharpen the image so it will look good on the web and this is why it is important to look at the image at the Actual Pixels view. There are numerous ways to sharpen images in Elements. The easiest method is to go to Enhance>Auto Sharpen. This method does a decent job for most photos.
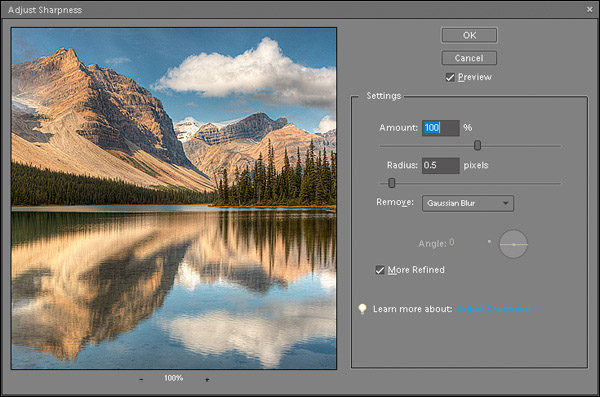
I prefer to sharpen manually and more precisely using Enhance>Adjust Sharpness. I set Remove to Gaussian Blur and Radius to 0.5 pixels (good for most web images). I also check More Refined (for more accurate blur removal) and then just move the Amount slider around until I see the sharpening I like (usually an amount of about 100 % works well).
Step 5 – The last step is to save your image so it is under the 200 KB (or 500 KB for larger images) size limit. Go to File>Save and name your file and make sure you save the image in JPEG format. Be sure the ICC Profile box is checked.
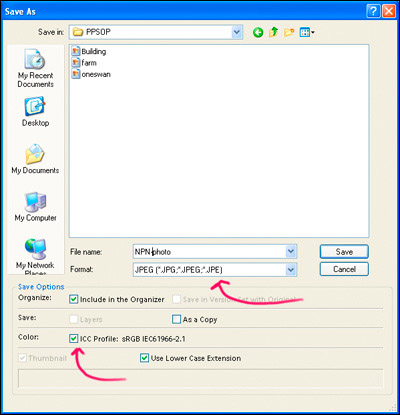
Click Save.
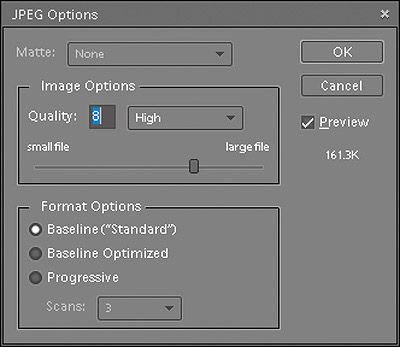
A JPEG Options dialog box will come up. Under the word Preview the file size will be shown. Move the slider until the image size is close to 200 k but not over. For Format Options, select Baseline (“Standard”). If you get a Quality setting of 6 or lower in order to be under 200 k, then you should try the alternative method of saving for the web described below.
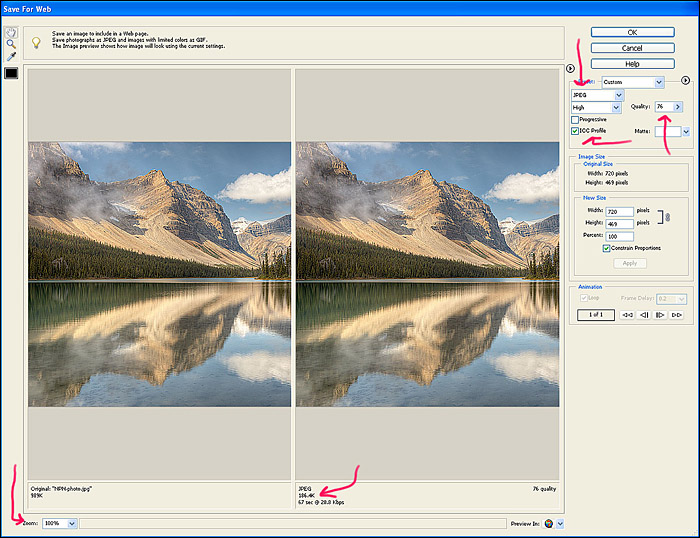
If you want to have more control over the file size and compression of your image then use the Save for Web dialog box (File>Save for Web). This option for saving JPEGs is better for images with lots of detail like forest scenes or complex textures. Make sure that you choose JPEG and click on ICC Profile then use the Quality slider to keep your image under 200 K. Also be sure you have the Zoom setting is at 100%. You can compare the before and after versions in the dialog box. The Save for Web dialog box offers more steps of compression than does saving an image as a JPEG using the Save command.
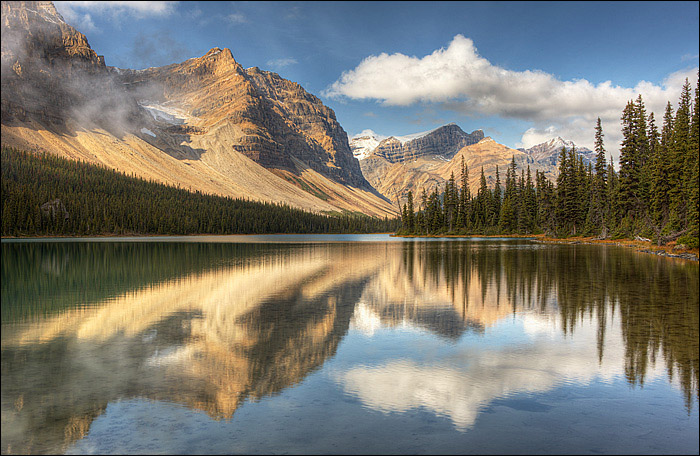
The photo below is the final prepared image ready for uploading to the NPN forums. So come on, resize those images and let us see your stuff!
Comments on NPN digital nature photography articles? Send them to the editor. NPN members may also log in and leave their comments below.
Darwin Wiggett is a professional nature and outdoor photographer from Alberta, Canada. You can see more of his work at www.darwinwiggett.com or at www.timecatcher.com.